This tutorial is copyrighted to Kaye @ Kaye'z Designz. You may print out for personal use but do not post to any site or distribute as your own. Any resemblance to others online is purely coincidental.
Supplies Needed: Paint Shop Pro any version, I used X3. You can get it from COREL. Several images with multiple colors in them but kinda on the dull side. I have included 3 images for use if you want them. If you use the Tree or Geese images please add my copyright to finished tag. Notes: Open image(s) in PSP.
Adjustment Layers are used to alter an image without affecting the original image.
You can get the same effects by going to Adjust / Brightness & Contrast or Hue & Saturation on Menu bar and choosing one of the effects listed. But the effect will be placed directly on your image.
STEP 1 Open an image of choice or one of mine. Duplicate and close the original for future use.
STEP 2 In the Layer Palette click on down arrow on icon that looks like two pieces of paper.
Select New Adjustment Layer and choose Hue / Saturation / Lightness.
If you don’t have that icon you can go to Layers / New Adjustment Layer on the Menu bar and select same effect.
STEP 3 When box opens up put checkmark in box that says Preview on Image so you can see effect immediately on your image. You can also click on arrow next to Preview to get rid of the windows at top of box.
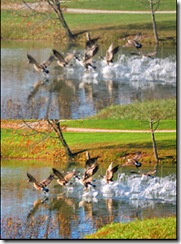
STEP 4 Play around with different numbers in the Hue, Saturation & Lightness boxes. On the Geese image I put -10 in Hue box and 50 in the Saturation box. You will see in Layer Palette a new layer called Hue / Saturation / Lightness 1 above the original image which is unchanged.
NOTE: You can add other Adjustment Layers in any order above your original image. Play around with the different types of Adjustment Layers and settings to see what you can come up with.
STEP 5 When satisfied with your settings save as a .pspimage so you can go back and make changes later.
STEP 6 Add your name and / or watermark. Add any copyrights if required.
STEP 7 If sending through your group Save as .jpg using Jpeg Optimizer but be sure to keep your .pspimage also.
All done! I hope you have enjoyed my tutorial. Remember this is just a guide. Experiment using different colors, gradients or patterns, images and settings. Any questions you can reach me at kayewinters@zoomtown.com. This tutorial was written 3/1/2010 by Kaye'z Designz.


No comments:
Post a Comment