My Terms Of Use

These tutorials are copyrighted to Kaye @ Kaye’z Designz. You may print them out for personal use but do not post to any site or distribute as your own. Any resemblance to others online is purely coincidental.

Sunday, July 12, 2009

The Player


Click HERE to view Animation
This tutorial is copyrighted to Kaye @ Kaye'z Designz. You may print out for personal use but do not post to any site or distribute as your own. Any resemblance to others online is purely coincidental.
Supplies Needed: Paint Shop Pro any version, I used X2. You can get it from COREL. Tube of choice. I used one by Ted Hammond, it can be purchased at CILM. You may use your own color, gradient or pattern I used Orange Weird Gradient. Font of choice or use mine LMS Monday Night. Mask of choice or use mine WSL mask 317 from weescotlass. Notes: Open tube and mask in PSP. Open font and minimize to task bar. SAVE OFTEN.

Step 1 Open new canvas 500 X 500. Flood Fill with color, gradient or pattern of choice. I used Orange Weird Gradient Angle 45, Scale 50 and Colorized with these settings: 110, 109. I then went to Adjust / Brightness - Contrast: -25, 20. Name this layer BG.

Step 2 Add a New Layer. Flood Fill with another color, gradient or pattern of choice. I used Orange Weird Gradient pattern Angle 45, Scale 50.

Step 3 Apply mask of choice. I used WSL mask 317 with Invert Mask Data unchecked. Merge / Merge Group. Drop Shadow of choice, I didn’t use one. Name this layer mask. NOTE: At this point you can Colorize your mask to match your tube.

Step 4 Copy and Paste tube(s) of choice above mask layer. Drop Shadow of choice, mine was 3, 3, 65, 10, Black. Position on canvas to your liking. Name this layer tube.

Step 5 Add any other elements of choice.

Step 6 Activate your top layer and Grab your Text Tool with font and size of choice. I used LMS Monday Night, Vector, Size 50, Bold, Stroke 1 black, for fill I used same pattern used on mask layer. Type your text / name. Add Inner Bevel of choice. I used Bevel #2, 9, 0, 2, 0, 0, White, 315, 50, 30. Add Drop Shadow of choice. I used 2, 2, 65, 3 Black. Name this layer text.

Step 7 Add any copyrights required and / or watermark. If you don’t wish to animate Save As .pspimage to retain layers for future changes. Save As .jpg using Jpeg Optimizer to send thru group.

ANIMATION

Step 1 Activate the mask layer and Duplicate 2 times for a total of 3 layers.

Step 2 Activate bottom mask layer and go to Alien Skin’s / Xenofex 2 / Constellation: 7.09, 100, 28, 4, 50, 48, 45, Keep Original Image, Random Seed 1. Move up to copy of mask layer and repeat Constellation but hit Random Seed button once. Do the same to copy (2) of mask layer, repeat Constellation and hit Random Seed button once.
Step 3 Hide copy and copy (2) of mask layer. Copy Merged, go to Animation Shop and Paste as New Animation.

Step 4 Hide original mask layer, unhide copy of mask layer. Copy Merged, go back to Animation Shop and Paste after Current Frame. Do the same with copy (2) of mask layer.

Step 5 Save as .gif file with these settings: Slider all the way to top for Better Quality. Under Colors tab: 255 colors, Optimized Octree, Error Diffusion. Under Optimizations tab: Check Write minimal frames and Map Identical Pixels other boxes should be unchecked.

All done! I hope you have enjoyed my tutorial. Remember this is just a guide. Experiment using different colors, gradients or patterns, images and settings. Any questions you can reach me at kayewinters@zoomtown.com. This tutorial was written 7/11/09 by Kaye'z Designz.

Friday, July 10, 2009

Floral Diamond


This tutorial is copyrighted to Kaye @ Kaye'z Designz. You may print out for personal use but do not post to any site or distribute as your own. Any resemblance to others online is purely coincidental.
Supplies Needed: Paint Shop Pro any version, I used X2. You can get it from COREL. Tube of choice. I used one by Celesse, it can be purchased at CILM. You may use your own color, gradient or pattern. I used Balls & Bubbles 01 pattern. Font of choice or use mine Novak Spring. Mask of choice or use mine sg_stencilled-floral-diamond. Supplies HERE.
Notes: Open tube in PSP. Open font and minimize to task bar. Save often.

Step 1 Open new canvas 500 X 500. Flood Fill with color, gradient or pattern of choice. I used #E0E0E0. Name this layer BG.

Step 2 Add a New Layer. Flood Fill with another color, gradient or pattern of choice. I used Balls & Bubbles 01 pattern. Apply Alien Skins / Xenofex 2 / Crumple: 5.04, 100, Distort checked, 135, 60, 7.96, 39.38, White, 34, Random Seed 1. Apply FM Tile Tools / Blend Emboss: Default settings.

Step 3 Apply mask of choice. I used sg_stencilled-floral-diamond with Invert Mask Data unchecked. Merge / Merge Group. Drop Shadow of choice, I used 1, 1, 100, 1, #00FF00. Name this layer mask.

Step 4 Copy and Paste tube of choice above mask layer. Drop Shadow of choice, mine was 3, 3, 65, 8, Black. Name this layer tube.

Step 5 Active mask layer. Grab your Text Tool with font and size of choice. I used Novak Spring, Vector, Size 65, Bold, Stroke 1 - black, for Fill I used same pattern used on mask layer. Type your text. Add Inner Bevel of choice. I used Bevel #2, 9, 0, 2, 0, 0, White, 315, 50, 30. Add Drop Shadow of choice. I used 2, 2, 65, 3, Black. Rotate Left, 45 Degrees. Place as in header image. Name this layer text.

Step 6 Add any copyrights required. Save as .pspimage to retain layers for future changes. Save as .jpg using Jpeg Optimizer to send thru group.

All done! I hope you have enjoyed my tutorial. Remember this is just a guide. Experiment using different colors, gradients or patterns, images and settings. Any questions you can reach me at kayewinters@zoomtown.com. This tutorial was written 7/9/2009 by Kaye'z Designz.

Garv's Sugar


This tutorial is copyrighted to Kaye @ Kaye’z Designz. You may print out for personal use but do not post to any site or distribute as your own. Any resemblance to others online is purely coincidental.

Supplies Needed: Paint Shop Pro any version, I used X2. You can get it from COREL. Tube of choice. I used one from Keith Garvey, you can purchase here MPT. You will need I. C. NET Software’s Filters Unlimited 2.0 HERE. LOTR02 pattern in supplies. If you use your own color, gradient or pattern results will not come out the same. Font of choice or use mine Vivian. Supplies.
Notes: Open tube and pattern in PSP and minimize. Open font and minimize on Task Bar and it will be available when needed. You will need the Script Toolbar & CenterLayer script, this script is standard in all PSP versions. Before doing this go to File / Workspace / Save and give it a unique name so you can re-load workspace if needed. To get the Script Toolbar go to View / Toolbars / Script. Click on it and it should appear on your workspace. Once you have the Toolbar visible click on the drop-down arrow and find the CenterLayer script. To Run script click on Run Selected Script (dark blue arrow icon). Save often.

Step 1 Open new canvas 600 X 600. Flood Fill with LOTR02 pattern, Angle 0, Scale 100. Adjust / Blur / Radial Blur: Twirl, 50, 30, Elliptical, 0, 0, 0. Name this layer BG.

Step 2 Add New Raster Layer. Selections / Select All. Selections / Modify / Contract by 20. Selections / Invert. Flood Fill with LOTR02 pattern, Angle 0, Scale 100. Effects / 3D Effects / Inner Bevel: Bevel #2, 9, 0, 2, 0, 0, White, 315, 50, 30. Effects / Artistic Effects / Colored Foil: 20, 32, White, 44. Selections / Invert. Name this layer border. Add New Raster Layer. Effects / 3D Effects / Cutout: 0, 0, 70, 30, Black. Select None. Name this layer Cutout.

Step 3 Add New Raster Layer. Flood Fill with LOTR02 pattern, Angle 0, Scale 100. Adjust / Blur / Radial Blur: Zoom, 50, Elliptical, 0, 0, 0. Effects / Plugins / I. C. NET Software’s Filters / Unlimited 2.0 / Buttons & Frames / Kaleidoscopic Frame (Round): 39, 153, 128, 27. Resize frame by 90%. Adjust / Hue and Saturation / Colorize: Use color from your tube. I used 253, 184. Effects / 3D Effects / Drop Shadow: 0, 0, 55, 15, Black. Name this layer circle.

Step 4 Copy and Paste your tube as New Layer. Optional - Effects / 3D Effects / Drop Shadow: 3, 3, 55, 8, Black. I didn’t use one since my tube was misted. Name this layer tube.

Step 5 Select Preset Shape Tool / Ellipse. Retain Style unchecked. Antialias & Create as Vector checked, Line Style Solid, Width 2. In Material palette set foreground to Black and close off background. Draw oval shape to same size as frame created in Step 3. Center on canvas by going to File / Script / Run / Center Layer or use Script toolbar. Duplicate oval and hide in layer palette. We will come back to it shortly. Highlight first oval layer.

Step 6 Select Text Tool. Add text and / or name with font and size of choice. I used Vivian, size 60, bold, stroke 1. Colors FG - Black, BG - LOTR02 pattern, Angle 0, Scale 100. Click on oval near top center until A with half circle appears. Type your text. When text is to your liking in layer palette click on plus sign (+) to open layer. Click on eye next to Preset Shape. This will close off oval. Go to Effects / 3D Effects / Inner Bevel use same settings as Step 2. Add Drop Shadow use same settings as Step 3. Name this layer text1.

Step 7 (Optional) Unhide 2nd oval layer. Image / Flip. Center on canvas by going to File / Script / Run / Center Layer or use Script toolbar. Select Text Tool with same settings in Step 6. Click on arrowheads on text options ribbon until you see Offset. Change it to a minus number. I used -35. If you use different font and size you may need to adjust this setting. This places your text above, on or below the oval. Click on oval at bottom center and type your name. In layer palette click on plus sign (+) to hide oval. Add same Inner Bevel and Drop Shadow from Step 6. Name this layer text2.

Step 8 Resize canvas to 500 X 500. Add your copyright(s) and / or watermark. Name layers CR and / or WM. Save as .pspimage to make future changes. Use JPEG Optimizer at default settings. Click on curved arrow to get default setting and Save as .jpg to send thru group.

All done! I hope you have enjoyed my tutorial. Remember this is just a guide. Experiment using different colors, gradients or patterns, images and settings. Any questions you can reach me at kayewinters@zoomtown.com. This tutorial was written 2/22/09 by Kaye’z Designz.

Egyptian Swirl


This tutorial is copyrighted to Kaye @ Kaye’z Designz. You may print out for personal use but do not post to any site or distribute as your own.

Supplies Needed: Paint Shop Pro any version, I used X2. You can get it HERE. Alien Skin / Eye Candy 5: Textures / Swirl get it HERE. Pattern - 15a with Wave & Art Media Effects. Egyptian Temple Ruins. shaz_Old Egyptian Dish. A Tube of choice. I am using the work of Blonde Blythe which you can purchase HERE. Supplies.
Notes: Put BG in your pattern folder or open on workspace and use Material Palette to select it.

Step 1 Open 500 X 500 transparent canvas. Flood Fill with Pattern - 15a with Wave & Art Media Effects. Go to Alien Skin / Eye Candy 5: Textures / Swirl: Add Swirl to Original Image, From Image Features, 141.73, 14.17. 0, 40, Random Seed 6079.

Step 2 While on pattern layer create a border by going to Selections / Select All. Selections / Modify / Contract by 15. Selections / Invert. In layer palette right-click on pattern layer and Select Promote Selection to Layer. Highlight promoted layer and rename border. Go to Effects / 3D Effects / Inner Bevel: Bevel #2, 9, 0, 2, 0, 0, White, 315, 50, 30. Selections / Invert. Go to Effects / 3D Effects / Cutout: V & H 0, Opacity 60, Blur 30, Black. Selections / Select None. Keep this layer on top in layer palette.

Step 3 Copy and Paste Egyptian Ruins tube as New Layer. Resize by 85%. Place in upper right of canvas.

Step 4 Copy and Paste Egyptian Dish tube as New Layer. Resize by 80%, Twice. Place in lower left of canvas.

Step 5 Copy and Paste tube as New Layer. Resize to fit inside dish. (See header image.)

Step 6 Add copyright and watermark.

Step 7 Add name or any text you want in font & size of choice, I used Formal, size 65. Add Inner Bevel: use same settings as Step 3. Add Drop Shadow: 2, 2, 55, 3, Black.

Step 8 Add your copyrights and / or watermark. Save as .pspimage to make future changes. Save as .jpg to send thru group.

All done! I hope you have enjoyed my tutorial. Remember this is just a guide. Experiment using different colors, gradients or patterns, images and settings. Any questions you can reach me here kayewinters@zoomtown.com. This tutorial was written 2/7/09 by Kaye’z Designz. © Kaye’z Designz

Friday, July 3, 2009

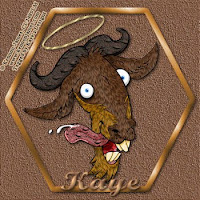
Gnu Day


This tutorial is copyrighted to Kaye @ Kaye’z Designz. You may print out for personal use but do not post to any site or distribute as your own. Any resemblance to others online is purely coincidental.

Supplies Needed: Paint Shop Pro any version, I used X2. You can get it from COREL. Tube of choice. I used one from Kennon James who used to be with CILM. I could not find a new site for him. Color, Gradient or Pattern of choice. Font of choice or use mine Formal.
Notes: Open tube in PSP, minimize. Open font and minimize on Task Bar and it will be available when needed. Pick two colors from tube, one light, one dark and create FG / BG gradient with these settings: Linear, Angle 45, Repeats 10, Invert - unchecked.
You will need the Script Toolbar & CenterLayer script, this script is standard in all PSP versions. Before doing this go to File / Workspace / Save and give it a unique name so you can re-load workspace if needed. To get the Script Toolbar go to View / Toolbars / Script. Click on it and it should appear on your workspace. Once you have the Toolbar visible click on the drop-down arrow and find the CenterLayer script. To Run script click on Run Selected Script (dark blue arrow icon).
You may also want to add Edit Selection icon to your layer palette. To do this right click on your workspace and select Customize. Under Categories scroll down to All Commands then under Commands on the right scroll down till you find Edit Selection. Click on icon and drag to upper part of Layer Palette where the icon for creating new layers is. Release the mouse and you should have the new icon there. Or you can go to Selections / Edit Selection.

Step 1 Open new canvas 500 X 500. Flood Fill with color, gradient or pattern of choice. I used #845C43. Go to Effects / Texture Effects / Fine Leather: #BCBCBC, 239, 30, 250, 139, 6. Name this layer BG.

Step 2 Add a New Raster Layer. Get your Selection Tool on the Tools Toolbar and choose one of the shapes in the drop-down. I used the Hexagon. Drag out your shape to fill most of the canvas. Click on Edit Selection icon in layer palette or go to Selections / Edit Selection. The selection will turn red and now you can edit it as if it were an image. Go to the Script Toolbar and run the CenterLayer script. Or go to File / Script / Run / CenterLayer. This will center selection on your canvas. You can Resize it now with the Raster Deform Tool if it’s too big or too small. Click on Edit Selection to stop editing. Do Not Deselect.

Step 3 Stay on the selection layer and go to Selections / Modify / Select Selection Borders (Alt + S + M + B). Select Inside and in Border Width type in amount you want border to be, I used 15. Flood Fill with color, gradient or pattern of choice that goes with your tube. Add Inner Bevel: Bevel #11, 5, 8, 3, 0, 0, White, 130, 45, 30. Deselect (Ctrl + D). Add Drop Shadow: 3, 3, 55, 8, Black. Name this layer Shape. I named mine hexagon.

Step 4 (Optional) If you want halo, Add New Layer. Go back to Selection Tool and choose Ellipse. Draw out oval to fit above your tube. Go to Selections / Modify / Select Selection Borders (Alt + S + M + B). Select Inside and in Border Width type in amount you want border to be, I used 5. Flood Fill selection with a gold gradient or pattern. Deselect (Ctrl + D). Add Drop Shadow. I used same settings from Step 3. Name this layer halo.

Step 5 Copy and Paste your tube as New Layer. Give tube a Drop Shadow of choice. I used same settings from Step 3. Name this layer tube.

Step 6 Select Text Tool. Add text and / or name with font and size of choice. I used Formal, size 65, stroke 2. Colors FG #845C43, BG #DBAF79. Changed BG to same gradient in Notes. Go to Effects / 3D Effects / Inner Bevel: Bevel #2, 9, 0, 2, 0, 0, White, 315, 50, 30. Add Drop Shadow: 2, 2, 55, 5, Black. Name this layer text. Place where desired.

Step 7 Add your copyright(s) and / or watermark. Name layers CR and / or WM. Save as .pspimage to make future changes. Use JPEG Optimizer at default settings. Click on curved arrow to get default setting and Save as .jpg to send thru group.

All done! I hope you have enjoyed my tutorial. Remember this is just a guide. Experiment using different colors, gradients or patterns, images and settings. Any questions you can reach me here kayewinters@zoomtown.com. This tutorial was written 2/16/09 by © Kaye’z Designz.

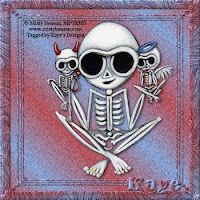
Good and Evil


This tutorial is copyrighted to Kaye @ Kaye’z Designz. You may print out for personal use but do not post to any site or distribute as your own. Any resemblance to others online is purely coincidental.
Supplies Needed: Paint Shop Pro any version, I used X2. You can get it HERE. Tube of choice. I used one from Misty Benson which can be purchased HERE. Eye Candy 3 zipped in Supplies. Unzip to your Plugin Folder. A mask of choice or use mine LB_mask2. Font of choice or use mine Vivian.
Notes: Open tube and mask in PSP minimize. Open font and minimize on Task Bar and it will be available when needed. Pick two colors from tube. I used foreground #B34F57, background #83A0D0. Make foreground gradient with these settings: Rectangle, Angle 90, Repeats 10, Invert unchecked.

Step 1 Open New Canvas 500 X 500 transparent. Flood Fill with white.

Step 2 Add a New Layer and Flood Fill with color, gradient or pattern of choice. I used gradient made in notes. On this layer go to Effects / Plugins / Eye Candy 3 / Swirl: 101, 10, 60, 100, Warp checked, Smooth unchecked.

Step 3 On same layer go to Layers / New Mask Layer / From Image. Invert Mask Data unchecked. Click on Source Window and select LB_mask2 or mask of choice. If you used same mask as mine go to Selections / from Mask. Marching ants will appear around mask. In layer palette right click on highlighted layer and choose Merge / Merge Group. Apply Inner Bevel: Bevel #2, 9, 0, 2, 0, 0, White, 315, 50, 30. Apply Drop Shadow: 1, 1, 50, 1, Black. Deselect (Ctrl + D).

Step 4 If you don’t like all the white that is showing now. Go back to background layer and Fill with color, gradient or pattern of choice. I used same colors but changed gradient to: Linear, Angle 45, Repeats 5, Invert unchecked. I also added Noise: Uniform, 30, Monochrome checked. (Adjust / Add - Remove Noise / Add Noise.)

Step 5 Activate top layer. Copy and Paste tube of choice as New Layer. Drop Shadow: 3, 3, 55, 8, Black.

Step 6 Select Text Tool. Add text and / or name with font and size of choice. I used Vivian, size 45. Closed off foreground and used same gradient from Step 4. I gave it same Inner Bevel from Step 3. And Drop Shadow: 2, 2, 55, 3, Black.

Step 7 Add your copyrights and / or watermark. Save as .pspimage to make future changes. Use JPEG Optimizer at default settings. Click on curved arrow to get default setting and Save as .jpg to send thru group.

All done! I hope you have enjoyed my tutorial. Remember this is just a guide. Experiment using different colors, gradients or patterns, images and settings. Any questions you can reach me here kayewinters@zoomtown.com. This tutorial was written 2/15/09 by © Kaye’z Designz.

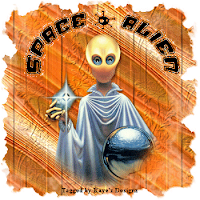
Space Alien


Click HERE to view animation.
This tutorial is copyrighted to Kaye @ Kaye’z Designz. You may print out for personal use but do not post to any site or distribute as your own. Any resemblance to others online is purely coincidental.

Supplies: Sparkle Witch BG tile (you can use from workspace or put it in your Patterns folder); Texture - dbmantique01 (put in your Texture folder); Mask - dmsk0139 by Diana Todd (put in your Mask folder); Tube - AK-UFO (not sure where this came from. If yours let me know and I will credit or delete). Font Alien Mushroom from dafont.com.

Step 1 Start with a 500 X 500 new image (canvas). Flood Fill with white so you can see better.

Step 2 Add a New Layer and Flood Fill with pattern Sparkle Witch BG tile. Go to Texture Effects / Texture: Find your dbmantique01 texture and apply these settings: Size 100, Smoothness 10, Depth 3, Ambience 0, Shininess 0, White, Angle 315, Intensity 50, Elevation 31.

Step 3 Go to Layers / Load/Save Mask / Load Mask from Disk. Find mask - dmsk0169 with these Settings: Source Luminance, Fit to Canvas, Hide All Mask - all checked, Invert Transparency - unchecked. Merge Group. Apply Drop Shadow: V & H 2, Opacity 55, Blur 2, Color - #FD7B11. This will brighten the mask a little. At this point you can Colorize the mask to match your tube or theme by going to Colorize and selecting a Hue & Saturation you like.

Step 4 Copy and Paste your tube as a New Layer. It will automatically be centered on your canvas. Resize if necessary and make any other changes you would like on the tube such as a Drop Shadow (I used V & H 3, Opacity 55, Blur 8, Color - Black). Add any other embellishments to create your tag.

Step 5 Add your copyright, name and / or watermark.

Creating Text on a Path

Step 1 Go to your Preset Shapes Tool and find the ellipse (circle) shape. Be sure Create as Vector and Antialias are checked. Uncheck Retain Style if there is a checkmark in it. Make your line width 2 and a solid line in Line Style. In the Material Box make your foreground black and background null (no color).

Step 2 Draw a circle (or oval) from left to right and down (top left to bottom right) a little larger than your tube. Once you release your mouse you can adjust the size and position using the top, left, right and bottom nodes on the bounding box that will be around your circle.

Step 3 Go to your Text Tool and select your font and size, both can be changed at anytime. I used Alien Mushroom, Size 45, Stroke - null, Fill - Black.

Step 4 Move your mouse over the vector circle until you get an “A” with an X above it and a half circle below it. Where the X shows is where your text will start. Before clicking on the circle move the (X - A - half circle) until it is close to the top center of your circle. Now click on the mouse button and the text box will open. Type in your text. If you don’t like the way it looks highlight the text in the text box and you can change the font, size, color or whatever you want. When happy with the way it looks click on the Apply button and your text will appear on the circle.

Step 5 Go to your Layer Palette and click on the plus (+) sign. There will be two (2) sub-layers. Click on the eye next to your circle layer which will remove it from your canvas. Right click on the layer where the +/- is and click on Convert to Raster Layer. If there is a lot of white space around your image you can Crop it to get rid of the extra space.

Step 6
Save as .pspimage to retain layers for future changes. Save as .jpg using Jpeg Optimizer to send thru group. Or continue to animate.


ANIMATION

Step 1 Duplicate the text layer twice and move the duplicates below the original text. On the copy of text layer Apply Eye Candy 4000 / Gradient Glow: Glow Width 5, Soft Corners 25, Overall Opacity 100, Draw Only Outside Selection - checked. On Color Tab use Medium preset and change color to #FD7B11 (if using same colors as I did). Put the same Glow on copy (2) of text layer.

Step 2 Go back to copy of text layer and apply Add Noise: Uniform, 50, Monochrome - checked. Do the same to copy (2) of text layer same settings.

Step 3 Back on copy of text layer go to Alien Skin / Xenofex 2 / Constellation: Star Size 2.76, Size Variation 18, Edge Star Density 30, Overall Star Density 0, Overdrive 100, Twinkle Amount 75, Twinkle Rotation 45, check - Keep Original Image, Random Seed (whatever is in the box). On the copy (2) of text layer use same settings but click once on Random Seed.

Step 4 In the layer palette X-Out copy (2) of text layer leaving copy of text layer showing and go to Edit / Copy Special / Copy Merged (if you don’t have the Copy Merged icon on your standard toolbar). Go to Animation Shop and Paste as New Animation.

Step 5 Back in PSP X-Out copy of text layer and unhide copy (2) of text layer. Go to Copy Merged again and then switch to Animation Shop and Paste after Current Frame.

Step 6 View Animation to see if everything is okay and Frame Speed is satisfactory. When happy with your animation save as .gif and you’re done.

All done! I hope you have enjoyed my tutorial. Remember this is just a guide. Experiment using different colors, gradients or patterns, images and settings. Any questions you can reach me here kayewinters@zoomtown.com. Written 7/25/08 by Kaye of Kaye’z Designz.

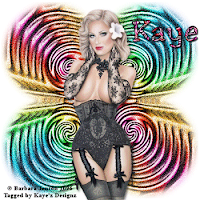
Twirls


Click HERE to view animation.
This tutorial is copyrighted to Kaye @ Kaye’z Designz. You may print out for personal use but do not post to any site or distribute as your own. Any resemblance to others online is purely coincidental.
Supplies needed: PSP any version. Tube of choice. I used tube from Barbara Jensen. Be sure to include copyright on your image. Font of choice (I used Novak Spring).

Step 1 Open new canvas 500 X 500 and Flood Fill with white. Add a New Layer.

Step 2 Pick two colors to use (I used 89377D for foreground and CC8BCD for background). Change foreground to Gradient: Linear, Angle 45, Repeats 10, Invert - Unchecked. Flood Fill your canvas. Go to Distortion Effects / Twirl: -720.

Step 3 Selections / Circle, put cursor in center of canvas and draw out a circle till you have a nice looking Twirl. Invert Selection and hit the Delete key. Apply Distortion Effects / Twirl: -720. Then again at 720. Resize Twirl to 250 X 250 and move to top left corner. Go to Effects / Plugins / Simple / Top Left Mirror.

Step 4 Go to Effects / Artistic Effects / Colored Foil using Custom 3 preset (Blur 40, Detail 80, Color - C0C0C0, Angle 133). Duplicate this layer and Resize by 90%. Duplicate new layer and Resize by 90%. Repeat this step 4 more times for total of 7 Colored Foil layers.

Step 5 Hide your white background layer and Merge Visible the Colored Foil layers. Unhide your background layer.

Step 6 Copy your tube and Paste as New Layer. OPTIONAL: Duplicate tube layer and move below original tube layer. Go to Effects / Plugins / EC5 Impact / Motion Blur: Direction 135, Length 351.44, Taper 65, Compress Sides 35, Opacity 40, Mask Selection 50. Adjust settings to suit your tube.

Step 7 Highlight original tube layer and apply Drop Shadow: V & H 3, Opacity 60, Blur 8, Color - Black.

Step 8 Add your name using font of choice, Size 72, Stroke 1.5, Direction - Vertical and Left. Apply Drop Shadow: V & H 2, Opacity 60, Blur 2, Color - Black.
Save as .pspimage to retain layers for future changes. Save as .jpg using Jpeg Optimizer to send thru group.

ANIMATION

Step 9 If you want to animate Duplicate Twirl layer once. Go back to original Twirl layer and apply DSB Flux / Bright Noise: Intensity 50, Mix. Go to copy of Twirl layer and apply DSB Flux / Bright Noise: Intensity 55, Mix.

Step 10 Hide your copy of Twirl layer and Copy Merged. Open Animation Shop and Paste as New Image.

Step 11 Back in PSP unhide copy of Twirl layer and hide original Twirl layer. Copy Merged. In AS Paste after Current Frame. View Animation and if to your liking save as gif.

All done! I hope you have enjoyed my tutorial. Remember this is just a guide. Experiment using different colors, gradients or patterns, images and settings. Any questions you can reach me here kayewinters@zoomtown.com. Written 8/7/07 by Kaye of Kaye’z Designz.

Kaye's Swirl Frame


This tutorial is copyrighted to Kaye @ Kaye’z Designz. You may print out for personal use but do not post to any site or distribute as your own. Any resemblance to others online is purely coincidental. This is my first tutorial attempt and was inspired by a tut from Marianne at PSP-Dynasty http://mariannes2001.homestead.com/FrameTut.html.
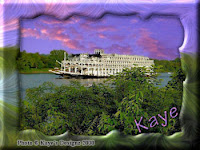
Supplies Needed: Jasc Paint Shop Pro 8 or any version. Eye Candy 4000. An image to frame. Picture I used is of the American Queen on the Ohio River taken by me on July 1st, 2000. Supplies.

Step 1 Choose graphic you wish to frame. Duplicate (Shift+D) and close original. Resize if necessary. If you Resize, go to Adjust / Sharpen / Sharpen. If image is on a background layer, go to Layer Palette, Right Click and choose Promote Background Layer. In Layer Palette click on the Duplicate Layer Icon and then make sure you are on the duplicated layer.

Step 2 Copy or (Ctrl-C) image. We will use this copy in a few minutes. Selections / Select All, Selections / Modify / Contract by 35 (may depend on size of graphic). Hit the Delete Key on your keyboard to remove center of image. It might not look like the center is removed but if you hover your mouse over the layer palette you will see the center is empty.

Step 3 Deselect and go to Effects / Plugins / Eye Candy 4000 / Swirl: Whirlpool Spacing 110.10, Smear Length 36.62, Twist 33, Streak Detail 62, Seamless Tile Unchecked, Random Seed 1. Feel free to experiment with other settings.

Step 4 Using the Magic Wand (click on Presets / Reset Arrow for default settings) and put checkmark in Anti-alias box. Click in center of image which will give you the Marching Ants. (You may wish to add a slight feather if you see jagged edges.) Effects / 3D Effects / Cutout: Vertical and Horizontal Offsets 0, Opacity 100, Blur 25, Shadow Color - Black (if image is dark, trying using white), Fill interior with color - unchecked.

Step 5 Selections / Invert or (Alt+S, I). Effects / 3D Effects / Inner Bevel: Bevel #2, Width 5, Smoothness 50, Depth 7, Ambience 0, Shininess 40, White, Angle 315, Intensity 50, Elevation 30. Or experiment with other presets.

Step 6 Selections / Invert or (Alt+S, I). Selections / Modify / Expand by 3. In the Layer Palette activate background layer, hold down the Shift key and Add a New Layer.

Step 7 Right click on Title Bar of image and choose Paste / Paste Into Selection, or press (Ctrl+Shift+L). Selections / Select None or (Ctrl+D). Save as .pspimage to retain layers for future changes. Save as .jpg using Jpeg Optimizer to send thru group.


All done! I hope you have enjoyed my tutorial. Remember this is just a guide. Experiment using different colors, gradients or patterns, images and settings. Any questions you can reach me here kayewinters@zoomtown.com. Tutorial Written 8/21/04.