My Terms Of Use

These tutorials are copyrighted to Kaye @ Kaye’z Designz. You may print them out for personal use but do not post to any site or distribute as your own. Any resemblance to others online is purely coincidental.

Monday, October 26, 2009

How to Animate & Keep Layers Intact

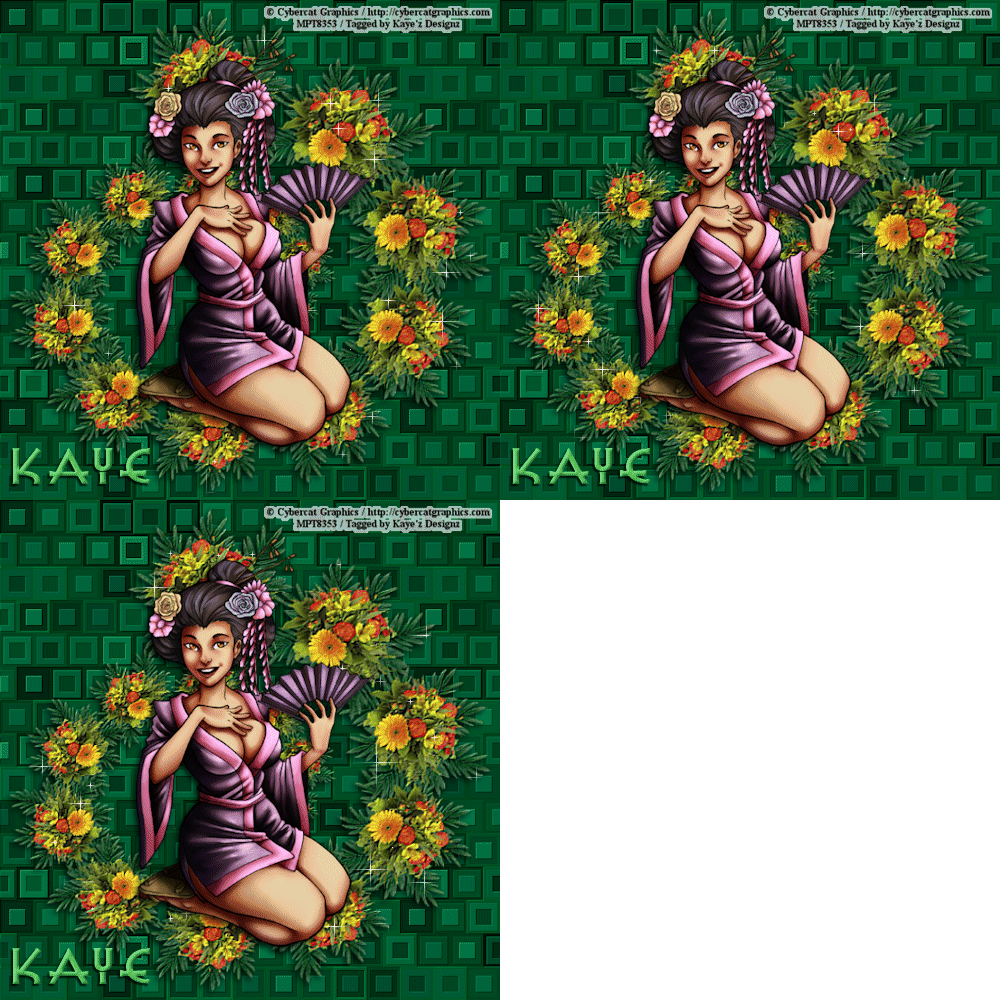
2009 10 26 - Cybercat - Asian - Lotis Mosaic 01a

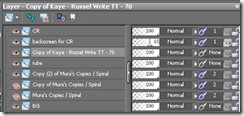
Layer Palette

This tutorial is copyrighted to Kaye @ Kaye'z Designz. You may print out for personal use but do not post to any site or distribute as your own. Any resemblance to others online is purely coincidental.

Create your tag as desired, keeping all layers visible (intact) see copy of layer palette. After you have tag to your liking Resize if needed, add your copyright and text and Save as a .pspimage.

Decide which layer you want to animate. I chose to add Sparkles to the flower layer (in layer palette I named that layer Mura’s Copies / Spiral).

I Duplicated that layer two more times for a total of 3 layers. I put a 2 in the Layer Link Toggle (chain). This helps keep layers from moving to avoid jumping in your animation.

Apply your Sparkles or other effect to each of the 3 layers you want to animate starting with the bottom one. When finished adding your effect to the layers you’re now ready to animate.

Open Animation Shop. Go back to PSP close off top 2 effects layers (in example that would be Copy of Mura’s Copies / Spiral and Copy (2) of Mura’s Copies / Spiral).

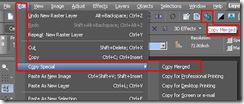
Go to Edit / Copy Special / Copy Merged or if you have the Copy Merged icon on your toolbar click on that. This will copy everything in layer palette that is open. Go to Animation Shop and Paste as New Animation.

Copy Merged

Back in PSP hide bottom effect layer and open next one up. Copy Merged and go back to Animation Shop. Paste after Current Frame.

One more time back to PSP hide effect layer you just used and open next layer up. Copy Merged and go back to Animation Shop. Paste after Current Frame.

View / Animation and if happy Save as a .gif and you’re done.

I hope you have enjoyed my tutorial. Remember this is just a guide. Experiment using different colors, gradients or patterns, images, settings and effects. Any questions you can reach me at kayewinters@zoomtown.com. This tutorial was written 10/26/09 by Kaye'z Designz.

Sunday, October 25, 2009

Xenofex 2 - Shatter

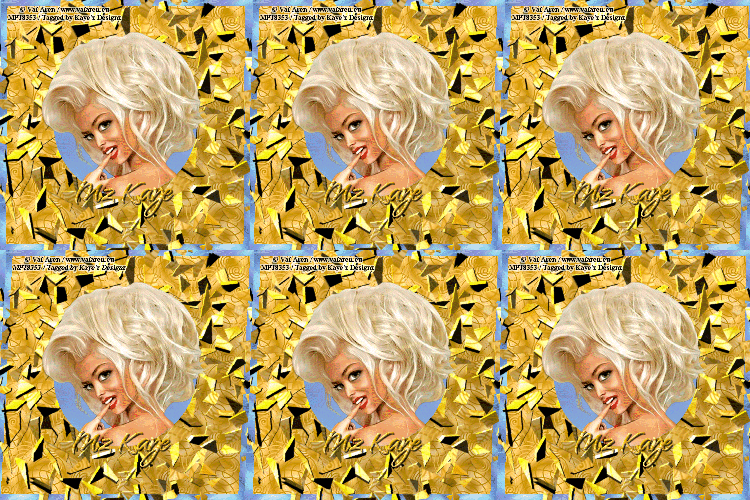
2009 10 24a - Xenofex 2 - Shatter 01b This tutorial is copyrighted to Kaye @ Kaye'z Designz. You may print out for personal use but do not post to any site or distribute as your own. Any resemblance to others online is purely coincidental.
Supplies Needed: Paint Shop Pro any version, I used X2. You can get it from COREL. Tube of choice. I used one by Val Aren, it can be purchased at MPT. You may use your own color, gradient or pattern. I used 2 Patterns LOTR 02 and Fun22 Gold. Font of choice or use mine Qwigley. Filter Needed: Alien Skin Xenofex 2 / Shatter. Notes: Open tube in PSP. Open font and minimize to task bar. Save often.

Step 1 Open new canvas 500 X 500. Flood Fill with color, gradient or pattern of choice. I used LOTR 02 Angle 0, Scale 100. Name this layer BG.

Step 2 Add a New Layer. Flood Fill with another color, gradient or pattern of choice. I used Fun22 Gold, Angle 0, Scale 50. Resize layer by 95%. Name this layer Shatter.

Step 3 On Shatter layer take your Selection Tool / Circle and click at 250, 250. Draw circle out to 100, 400. Don’t Deselect.

Step 4 Go to Alien Skin Xenofex 2 / Shatter: 26.08, 30, 56, 100, 27, 23.04, Make Selection Transparent, Random Seed 1. Deselect.

Step 5 Find tube you want to use. Copy and Paste on your canvas. Rename tube.

Step 6 With Magic Wand click inside Shatter layer circle. Selections / Invert. Activate tube layer and either hit Delete or use Eraser Tool to erase parts of tube you don’t want overlapping circle. I just erased some at the bottom.

Step 7 Add your text and/or name with font of choice. I used Qwigley, 80, Bold, Stroke 1.5 Fun22 Gold, Fill same as stroke. Place where you like.

Step 8 Add Inner Bevel: Bevel #2, 9, 0, 2, 0, 0, White, 315, 50, 30.

Step 9 Add Drop Shadow: 2, 2, 80, 2, Black.

Step 10 Add copyright making sure it is readable. Add your watermark.

Step 11 At this point you can stop and go to JPEP Optimizer and save to send thru your group. Make sure you save your .pspimage in case you want to change anything.

IF YOU WANT TO ANIMATED CONTINUE

Step 1 Open Animation Shop. Back in PSP Copy Merged. Go to AS and Paste as New Animation.

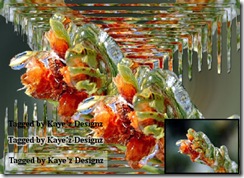
Step 2 Go to Effects / Insert Image Effect / Shear: Start with Animation Frame, Effects Length 2.5, Frames per Second 3 fps, Contains total of 7 frames. Customize: Shear Distance 15, Horizontal, Wrapped checked.

Step 3 Select Frame 1 and Delete. Select new frame 1 and Select All Frames, Copy. Select Frame 7 only and Paste after Current Frame. While still selected go to Animation / Reverse Frames.

Step 4 This animation creates a very large file at 500 X 500. To reduce file size I Selected All frames went to Animation / Cull Animation and put 2 in the box. I also Resized frames to 250 X 250.

Step 5 View Animation and if satisfied, Save As .gif file with these settings: Slider all the way at top for Better Quality. Under Colors tab: 255 colors, Optimized Octree, Error Diffusion. Under Optimizations tab: Check Write minimal frames and Map Identical Pixels other boxes should be unchecked.

All done! I hope you have enjoyed my tutorial. Remember this is just a guide. Experiment using different colors, gradients or patterns, images and settings. Any questions you can reach me at kayewinters@zoomtown.com. This tutorial was written 10/24/09 by Kaye'z Designz.

Tuesday, October 20, 2009

Creating a Backscreen for CRs or WMs

2009 10 18a - Creating a Backscreen for CRs - WMs 01a This tutorial is copyrighted to Kaye @ Kaye'z Designz. You may print out for personal use but do not post to any site or distribute as your own. Any resemblance to others online is purely coincidental.
The greatest benefit to using a Backscreen is not only the pleasing look, but also that it aids in making text stand out well on backgrounds that may otherwise be difficult to place text on. This tutorial is inspired by the Backscreen Tutorial created by Jasc Art Resource Center. NOTE: Any reference to CR also applies to a WM.

No Supplies. Create your tag as you normally would but don’t add CR yet! Resize the tag to a manageable size. I use 500 for longest side.
Add the CR as a New Layer and move to desired spot. If the CR is readable everything is fine at this point.
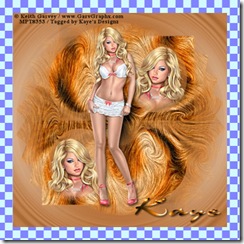
However, if your tag is busy or dark you may not be able to read the CR as clearly as you should (top image on tag).

There is a Solution!

Step 1 Add a New Layer, move below the CR. Rename layer backscreen.
Step 2 Go to Selection Tool, Rectangle.
Step 3 Draw a rectangle that extends 10 to 15 pixels around the CR.
Step 4 Flood Fill with white or another color that compliments the tag.
Step 5 Lower the Opacity of backscreen layer until you can see tag below and the CR is still readable (bottom image on tag). NOTE: Instead of lowering Opacity you can change backscreen layer’s Blend Mode to Soft Light and it should have the same effect.

OK, Say your backscreen looks too intrusive and you want to put it just around the CR. That can be done.

Step 6 Highlight CR layer.
Step 7 Take the Magic Wand and select anywhere in the canvas.
Step 8 Go to Selections / Invert. Just the text should be selected.
Step 9 Go to Selections / Modify / Expand by 2 or however wide you want the backscreen to be.
Step 10 Go to Selections / Invert again.
Step 11 Highlight the backscreen layer and hit the Delete key on the keyboard.
Step 12 Selections / Select None. (Middle image on tag.)

TIP: You can Merge Down the CR layer onto the backscreen layer so you can move it around the tag to a spot where the CR is most readable. OR you can click on the Layer Link Toggle for both layers in the Layer Palette and they will change to a one (1) and you can move them around without Merging. That way if you need to change the Opacity or Blend Mode you won’t have to start over.

All done! I hope you have enjoyed my tutorial. Remember this is just a guide. Experiment using different colors, gradients or patterns, images and settings. Any questions you can reach me at kayewinters@zoomtown.com. This tutorial was written 10/18/09 by Kaye'z Designz.

Creating a Border without PSP’s Add Borders


This tutorial is copyrighted to Kaye @ Kaye'z Designz. You may print out for personal use but do not post to any site or distribute as your own. Any resemblance to others online is purely coincidental. No supplies.

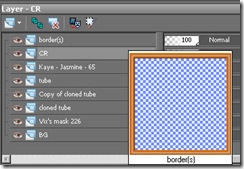
Okay, you’ve worked on a tag for hours or days with layers intact (BG, mask, tube, elements, name and CR and/or WM, etc.) and finally have it the way you want. You want to save it as .pspimage with layers so you can make changes to any layer as needed (different tube, name, CR or whatever). Now you want to add border(s) to it but don’t know how to keep your separate layers. If you use PSP’s Add Borders you will lose your layers as this effect Flattens the image to a single layer. WHAT to DO!
First, either create a tag with layers or find one you’ve done with layers intact, no border. If you use one already created Duplicate it and close original.

Step 1 You need to determine how wide a border you want around your tag. For example say your tag is 500 X 500 and you want 3 borders of 10 pixels each for a total 30 pixel border.

Step 2 Remove your CR layer and Paste as New Image. Go to Image / Canvas Size and add 60 to width and height of tag. Your canvas will be 560 X 560. The white in this image is your Resized canvas part.

Screenshot of Canvas Size Before Adding Borders Step 3 Add a New Layer and name it border(s).

Step 4 Flood Fill layer with color you want your outer layer to be usually a dark color from tube.

Step 5 Go to Selections / Select All. Selections / Modify / Contract by 10.

Step 6 While still selected Flood Fill with another color, gradient or pattern. Go to Selections / Modify / Contract by 10.

Step 7 One more time Flood Fill with same color (or any color you want) as outer border. Go to Selections / Modify / Contract by 10. Keep selected.

Step 8 Hit the Delete key on keyboard. Your original tag should now be showing with a border around it.

Layer Palette

Step 9 If you want to add an Inner Bevel to the border go to Selections / Invert and apply your favorite Bevel. Select None.

At this point I Resize my canvas back to 500 X 500. Add your CR layer back to your tag.

Note: If your colors are different enough you could select each border and apply an Inner Bevel or some other effect to each one instead of all 3 at once.

Note: You can leave your border layer at the top of your layer palette or move it to the bottom.

All done! I hope you have enjoyed my tutorial. Remember this is just a guide. Experiment using different colors, gradients or patterns, images and settings. Any questions you can reach me at kayewinters@zoomtown.com. This tutorial was written 10/13/09 by Kaye'z Designz.