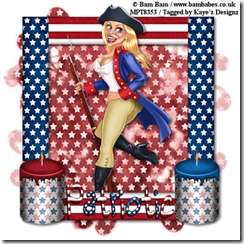
This tutorial is copyrighted to Kaye @ Kaye'z Designz. You may print out for personal use but do not post to any site or distribute as your own. Any resemblance to others online is purely coincidental.
Supplies Needed: Paint Shop Pro any version, I used X2. You can get it from COREL. Tube of choice. I used one by Suzanne Richards, it can be purchased at CILM. Do not use without a license. You may use your own color, gradient or pattern. Paper from scrap kit of choice. I used Paper9 from Voodoo’s St Patty Scrap. I enclosed a pattern for use if you don’t have any papers. Font of choice, I used PattyDay. Template #25 by Kristin at Toxic Desirez. You will need to download Templates 20-29 but then you can delete the ones not wanted. Filters needed: Eye Candy 3.1 / Glow and DSB Flux / Bright Noise (if you animate). Notes: Open tube and paper in PSP. Open font and minimize to task bar. SAVE OFTEN.
Step 1 Open Template 25 by Kristin. Go to Image / Resize and change Resolution to 72.000. Be sure to change Pixel Dimension size back to original size i.e. 600 pixels or change Percentage back to 100. Save. Duplicate then close original. This step is necessary if using a PTU tube per artists’ TOUs. Go to Image / Canvas Size and add 50 pixels to all sides.
Step 2 In Layer Palette Delete the top layer (copyright). Also Delete the Large Clover layer. Go to bottom layer, if it’s blank rename BG (Background) and Flood Fill with white. If bottom layer is the clover 1 layer add a New Layer and move to bottom of layer palette. Flood Fill with white and name BG.
Step 3 With BG layer still active Copy and Paste paper of choice as New Layer. Go to Selection Tool - Circle and draw a circle approximately 325 by 325 pixels. Making sure paper layer is selected go to Selections / Invert and hit Delete on keyboard. Center layer on image. Rename paper.
Step 4 Select clover 1 layer. Selections / Select All, Selections / Float, Defloat. Selections / Modify / Expand by 1. Flood Fill with #15632C or color of choice. Deselect. Apply Inner Bevel of choice. I used Bevel #2, 9, 0, 2, 0, 0, White, 315, 50, 30. Apply Drop Shadow of choice. I used 2, -2, 100, 2, Black. Repeat Drop Shadow changing V & H to -2, 2.
Step 5 Select clover 2 layer and repeat Step 4 but change color to #54CA60 or color of choice. Deselect and Repeat Inner Bevel and both Drop Shadows.
Step 6 Still on clover 2 layer Copy and Paste tube as New Layer. Give tube a Drop Shadow of choice. I used 3, 3, 65, 8, Black. With Eraser Tool erase bottom of tube where it overlaps clover 1 and clover 2 layers. Rename tube.
Step 7 Highlight word art layer. In layer palette change top box color to #15632C or color of choice. Using the Change to Target Brush, size 100 run your cursor over all the text. Release mouse button and then do again. I also used Adjust / Brightness / Contrast at -40, 40 to darken text more. Apply Inner Bevel: Bevel #2, 9, 0, 2, 0, 0, White, 315, 50, 30. Go to Effects / Plugins / Eye Candy 3.1 / Glow: 2, 100, Fat, Black, Draw Everywhere unchecked (no button look).
Step 8 Resize tag to size allowed for your group. Add any copyrights required.
Step 9 Add your name with font and size of choice.
Step 10 Save as .pspimage to retain layers for future changes. Save as .jpg using Jpeg Optimizer to send thru group.
IF YOU CHOOSE TO ANIMATE FOLLOW BELOW STEPS
ANIMATION
Step 1 Activate the paper / circle layer and Duplicate 2 times for a total of 3 layers.
Step 2 Activate bottom paper / circle layer and go to Effects / Plugins / DSB Flux / Bright Noise: Intensity 50, Mix checked. Move up to copy of paper / circle layer and repeat DSB Flux changing Intensity to 55. Do the same to copy (2) of paper / circle layer, repeat DSB Flux changing Intensity to 60.
Step 3 Hide copy and copy (2) of paper / circle layer. Copy Merged, go to Animation Shop and Paste as New Animation.
Step 4 Hide original paper / circle layer, Unhide copy of paper / circle layer. Copy Merged, go back to Animation Shop and Paste after Current Frame. Do the same with copy (2) of paper / circle layer.
Step 5 Save as .gif file with these settings: Slider all the way at top for Better Quality. Under Colors tab: 255 colors, Optimized Octree, Error Diffusion. Under Optimizations tab: Check Write minimal frames and Map Identical Pixels other boxes should be unchecked.
All done! I hope you have enjoyed my tutorial. Remember this is just a guide. Experiment using different colors, gradients or patterns, images and settings. Any questions you can reach me at kayewinters@zoomtown.com. This tutorial was written 1/28/10 by Kaye'z Designz.


