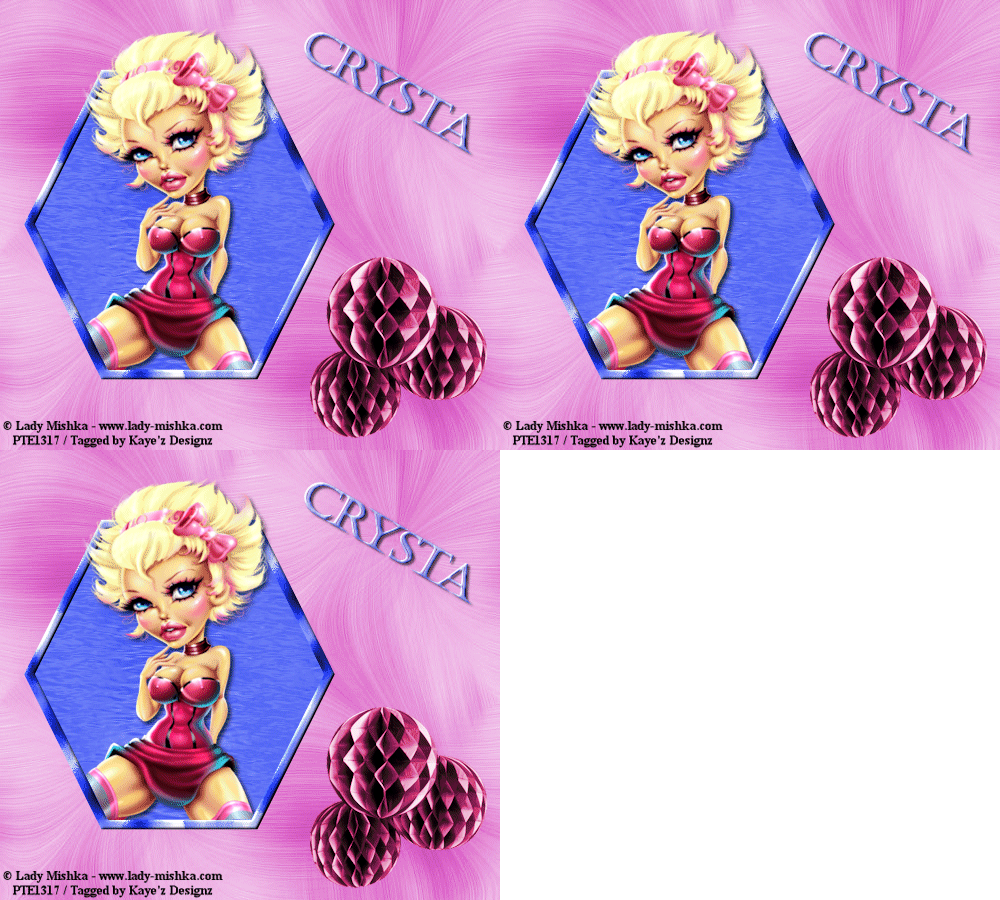
This tutorial is copyrighted to Kaye @ Kaye'z Designz. You may print out for personal use but do not post to any site or distribute as your own. Any resemblance to other tutorials online is purely coincidental.
Supplies: Paint Shop Pro any version, I used X3. You can get it from COREL. Tube of choice. I used one by Lady Mishka, which can be purchased at PTE. You may use your own color, gradient or pattern, I used EC5 Textures Swirl (attached). Displacement Map - Ocean (attached). Font of choice, I used Castellar, cannot share as it is PTU. Plugins Needed: None.
Preparation: Open PSP. Open or Unzip the supplies and save to working folder. Open tube in PSP. Duplicate and close the original. Minimize font to task bar if not in PSP drop-down list.
Notes: I used PSP X3 but you should be able to work in other versions with minor changes. You may need to change the Font size if using version 9 or lower of PSP. Some effects may be in different places or not in your PSP version but available under Customize (Right click on workspace). Should have some knowledge of PSP. In material palette change foreground to color, gradient or pattern, background to color of choice.. SAVE OFTEN.
This tutorial was inspired by Tricia’s Tutorial http://www.force50.co.uk/animated_mermaid_tutorial.htm.
STEP 1 Open new canvas 500 X 500 or size of choice, Resolution 72.0. Flood Fill with color, gradient or pattern of choice. I used EC5 Textures Swirl. Colorize to Pink using Hue 235, Saturation 160 or Colorize of choice. Name this layer BG.
STEP 2 Add a New Layer. Flood Fill with pattern of choice to use for “water”. I used EC5 Textures Swirl. Apply Seamless Tiling at default settings. Apply Gaussian Blur using 20 - 35 depending on pattern. Colorize to Blue using Hue 165, Saturation 225 or Colorize of choice. Name this layer water 1.
STEP 3 Duplicate water layer 2 times for total of 3 layers. Name copies water 2 and water 3. On water 1 layer go to Effects / Distortion Effects / Displacement Maps: Map = Ocean, Tile Map to Cover Image, Size 80%, Blur 0, 3D Surface, Intensity 100%, Rotation 0, Edge Mode - Repeat. On water 2 change Size to 85% and on water 3 change Size to 90.
STEP 4 Select Preset Shape of choice, I used the Hexagon: Retain Style unchecked, Antialias and Create as Vector checked, Line Style - Solid, Line Width 10. Foreground - color, gradient or pattern of choice. Background null. Draw out your chosen shape to size you want. Mine came out to about 325 X 325. Move the shape over “water” layers to where effect looks best. Apply Inner Bevel of choice if desired. Name this layer frame.
STEP 5 Once frame is placed where you want it click inside with Magic Wand. Expand by 5 and Invert Selection. In layer palette select the water layers and hit Delete on each one. NOTE: If you put a 1 in the Layer Link Toggle in layer palette next to the frame and 3 water layers you can move those layers as one to place back in center or where ever you want.
STEP 6 Add your tube over frame and Resize it so parts of water layers show through. Give it a Drop Shadow of choice. Name this layer tube.
Click inside frame layer with Magic Wand and Expand by 1, Invert Selection. Activate tube layer. With Eraser Tool, Erase parts of tube you don’t want covering the frame. On mine I erased her legs but left head on top of frame.
STEP 7 Add any other elements you want to decorate your tag, Resizing each as needed. Give each element a Drop Shadow of choice.
STEP 8 If you used a canvas size larger than 500 X 500 at beginning or need smaller size for group requirements, Resize it to 500 or required size on longest side, other side will self adjust.
STEP 9 Add your copyright (CR) information making sure it is readable and place on tag in a place that won’t distract from the tag. Add your name and / or any text desired in font and size of choice.
STEP 10 Save as .pspimage to retain layers for future changes. You can Save as .jpg using JPEG Optimizer to send thru group or if you wish to animate continue.
ANIMATION
STEP 11 All layers open except top 2 water layers and Copy Merged. In Animation Shop Paste as New Animation.
Close water 1, open water 2, Copy Merged. In AS Paste after Current Frame.
Close water 2, open water 3, Copy Merged. In AS Paste after Current Frame.
I changed Frame Properties to 20 but you can leave at 10 or any speed you want.
View Animation and when happy Save As a .gif to same folder as your .pspimage.
All done! I hope you have enjoyed my tutorial. Remember this is just a guide. Experiment using different colors, gradients or patterns, images and settings. Any questions, you can reach me at kayewinters@zoomtown.com**. This tutorial was written 3/4/2011 by Kaye'z Designz.


