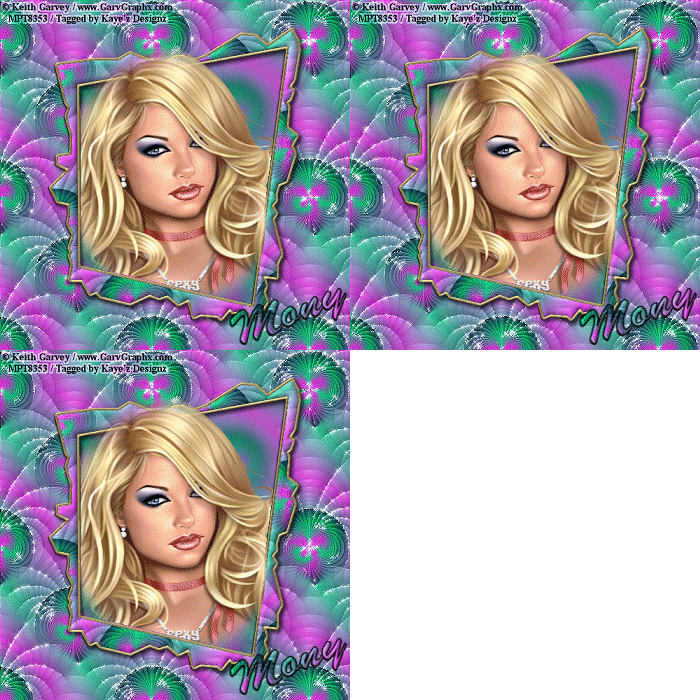
This tutorial is copyrighted to Kaye @ Kaye'z Designz. You may print out for personal use but do not post to any site or distribute as your own. Any resemblance to others online is purely coincidental.
Supplies: Paint Shop Pro any version, I used X2. You can get it from COREL. Animation Shop if you choose to animate. Tube of choice. I used one by Keith Garvey, it can be purchased at My PSP Tubes. FFQ Gravity Blossom pattern, FrameTemp22-TYA You may use your own color, gradient or pattern. Font of choice. Notes: Open font and minimize to task bar. Save often. If you choose to animate and want to keep layers intact on your .pspimage check this out: How to Animate & Keep Layers Intact.
Step 1 Open supplies in PSP and minimize. Open new canvas 500 X 500, transparent.
Step 2 In Material Palette choose Patterns and find FFQ Gravity Blossom or one of choice - Angle 0, Scale 100. Flood Fill canvas. Name this layer BG.
Step 3 Maximize frame and Paste as New Layer on canvas. Name this layer frame.
Step 4 With Magic Wand select black area of frame and Flood Fill with same pattern but change settings to Angle 0, Scale 50. Apply Inner Bevel of choice then Deselect.
Step 5 With Magic Wand select white area of frame. Selections / Modify / Expand by 2. Apply favorite Super Blade Pro gold preset or other gold pattern. Apply same Inner Bevel then Deselect. Resize by 85%.
Step 6 Open tube of choice and Paste on canvas. Resize if needed, I Resized by 85%. Name layer tube.
Step 7 Activate frame layer and with Magic Wand select the center. Selections / Modify / Expand by 1. Selections / Invert.
Step 8 Activate the tube layer and either hit Delete or use Eraser Tool to erase parts of tube not wanted. I erased bottom and both sides leaving top showing over frame. Deselect.
Step 9 Add Drop Shadow of choice to frame and tube layers.
Step 10 Add copyright making it small but readable. If the background is dark or busy see my tutorial on Creating a Backscreen for CRs.
Step 11 Add text and / or name using same pattern set to Angle 0, Scale 25 for Fill. Make Stroke 1, Black. Apply same Inner Bevel.
Step 12. Save as .pspimage to retain layers for future changes. Save as .jpg using Jpeg Optimizer to send thru group.
IF YOU CHOOSE TO ANIMATE FOLLOW STEPS BELOW
Step 1. Activate the BG layer and put a 1 in the Layer Link Toggle (chain). Duplicate 2 times for a total of 3 layers.
Step 2. Activate bottom BG layer and go to Alien Skin / Xenofex 2 / Constellation: 2, 50, 50, 0, 100, 75, 45, Keep Original Image, Random Seed 1. Move up to copy of BG layer and repeat Alien Skin / Xenofex 2 / Constellation and hit Random Seed once. Do the same to copy (2) of BG layer, hit Random Seed once.
Step 3. Hide copy and copy (2) of BG layer. Go to Edit / Copy Special / Copy Merged or click on Copy Merged icon if you have it on toolbar.
Step 4. Go to Animation Shop and Paste as New Animation. Back in PSP Hide original BG layer, unhide copy of BG layer. Copy Merged, go back to Animation Shop and Paste after Current Frame. Do the same with copy (2) of BG layer.
Step 5. View Animation and if happy Save as .gif file with these settings: Slider all the way at top for Better Quality. Under Colors tab: 255 colors, Optimized Ochre, Error Diffusion. Under Optimizations tab: Check Write minimal frames and Map Identical Pixels other boxes should be unchecked.
All done! I hope you have enjoyed my tutorial. Remember this is just a guide. Experiment using different colors, gradients or patterns, images and settings. Any questions you can reach me at kayewinters@zoomtown.com. This tutorial was written 11/29/09 by Kaye'z Designz.


No comments:
Post a Comment