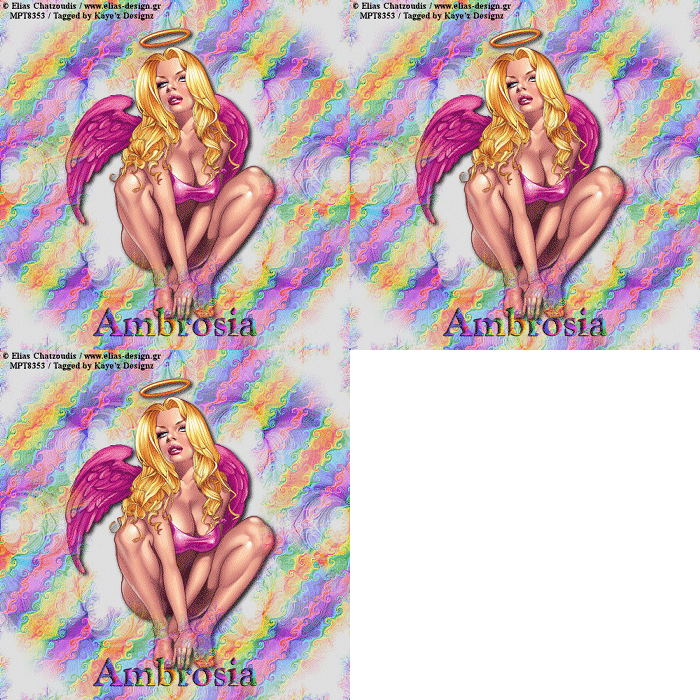
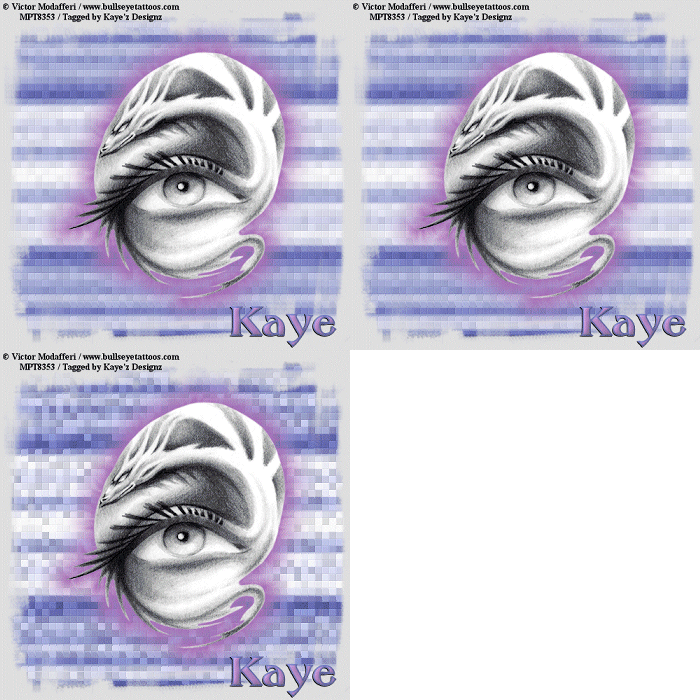
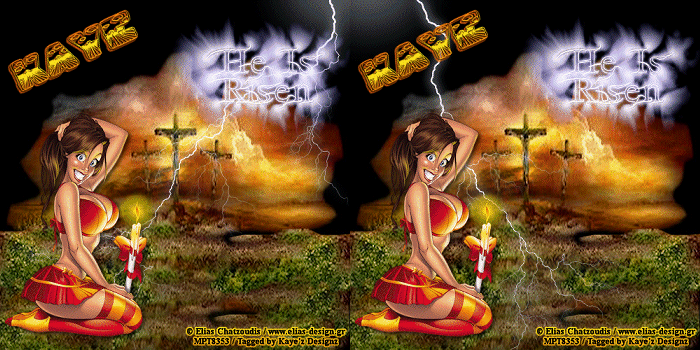
My Terms Of Use

These tutorials are copyrighted to Kaye @ Kaye’z Designz. You may print them out for personal use but do not post to any site or distribute as your own. Any resemblance to others online is purely coincidental.

Tuesday, September 7, 2010

Just Chillin

2010 09 07a - Just Chillin' 01b (for web)

This tutorial is copyrighted to Kaye @ Kaye'z Designz. You may print out for personal use but do not post to any site or distribute as your own. Any resemblance to others online is purely coincidental.
Supplies Needed: Paint Shop Pro any version, I used X3. You can get it from COREL. Tube of choice. I used one by Erica Hesse at MPT. You may use your own color, gradient or pattern, I used a pattern I created which is in supplies. Font of choice or use mine Chiller. Mask of choice or one I supplied. Notes: Open tube in PSP. Open font and minimize to task bar. Always save as a .pspimage first and keep that file in case you want to make any changes, i.e. you can change tube, name or anything you like but without starting over. SAVE OFTEN.

STEP 1 Open new canvas 500 X 500, Resolution 72.0. Flood Fill with color, gradient or pattern of choice. I used #E0E0E0. Name this layer BG.

STEP 2 Add a New Layer. Flood Fill with pattern of choice or one I supplied. If you have Alien Skin / Snap Art you can apply Water Color Preset: Assorted, Full Coverage as I did. Or you can use another filter you have that will give a similar effect. Virtual Painter from Corel is another choice.

STEP 3 On same layer apply mask of choice or one I supplied. If you use mine, put a check in Invert Mask Data. Merge Group.

STEP 4 Duplicate mask layer. Mirror, Flip. Move copy of mask to upper left corner. Move original mask layer to bottom right corner. Back on copy of mask go to Layers, Merge Down. Resize 90%. Name this layer mask.

STEP 5 Add tube of choice. Resize if necessary. Add Drop Shadow of choice. I erased part of tube at bottom so it sits on the circle. Name this layer tube.

STEP 6 Grab your Text Tool with font and size of choice. I used Chiller, Vector, Size 35, Bold, Stroke of choice, for fill I used same pattern as from Step 2. Type your text. Add Inner Bevel of choice. Add Drop Shadow of choice. Name this layer text. You can put your text on a circle by going to preset shapes circle, line width 2. Black in foreground box, background box null. Draw out an ellipse to fit on top left circle of mask. Then do your text.

STEP 7 Resize tag for any group requirements. Then add artist’s copyright information, add your watermark. Name each layer.

STEP 8 Save as .pspimage to retain layers for future changes. Save as .jpg using Jpeg Optimizer to send thru group. If you wish to animate continue.

TO ANIMATE
STEP 1 Activate the mask layer and Duplicate 2 times for a total of 3 layers.

STEP 2 Activate bottom mask layer and go to Eye Candy 5 / Impact / Perspective Shadow use preset: Reflect in Front, Sharp. Adjust bounding box handles so Shadow fits on tag. Move up to copy of mask layer and repeat Perspective Shadow but change Offset Direction to 260. Do the same to copy (2) of mask layer but change Perspective Shadow to 250.

STEP 3 Hide copy and copy (2) of mask layer. Copy Merged, go to Animation Shop and Paste as New Animation.

STEP 4 Hide original mask layer, unhide copy of mask layer. Copy Merged, go back to Animation Shop and Paste after Current Frame. Do the same with copy (2) of mask layer. Select All and change Frame Properties to 25.
For a smoother effect, while frames are still selected Copy and go to frame 3. Paste after Current Frame.
Do Not Deselect. Go to Animation / Reverse Frames. View Animation.

STEP 5 If happy Save as .gif file with these settings: Slider all the way at top for Better Quality. Under Colors tab: 255 colors, Optimized Octree, Error Diffusion. Under Optimizations tab: Check Write minimal frames and Map Identical Pixels other boxes should be unchecked.

All done! I hope you have enjoyed my tutorial. Remember this is just a guide. Experiment using different colors, gradients or patterns, images and settings. Any questions or if you would like to show me your results, you can reach me at kayewinters@zoomtown.com. This tutorial was written 9/7/10 by Kaye'z Designz.

Thursday, August 26, 2010

Blowing in the Wind

2010 08 26a Blowing in the Wind 01b

This tutorial is copyrighted to Kaye @ Kaye'z Designz. You may print out for personal use but do not post to any site or distribute as your own. Any resemblance to others online is purely coincidental.
Supplies Needed: Paint Shop Pro any version, I used X3. You can get it from COREL. Tube of choice. I used one by Elias Chatzoudis, you must purchase a license from MPT to use. You may use your own color, gradient or pattern, I used a pattern I created. Mask of choice. I enclosed one you can use. Font of choice, I used CordialBlk which came with a program installed on my computer but I don’t know which one. Notes: Open supplies in PSP. Open font and minimize to task bar. SAVE OFTEN.

STEP 1 Open new canvas 500 X 500, Resolution 72.0. Flood Fill with color, gradient or pattern of choice. I used #E0E0E0. Name this layer BG.

STEP 2 Add a New Layer. Flood Fill with pattern of choice, I used a pattern I created. Apply mask of choice. Merge Group. Name this layer mask.

STEP 3 Copy and Paste tube of choice. Resize if needed. Drop Shadow of choice, mine was 3, 3, 65, 8, Black. Name this layer tube.
Move it below mask layer. Select All, Float, Defloat. Activate the mask layer and Erase the mask from around the head area.

STEP 4 Add any elements of choice.

STEP 5 Grab your Text Tool with font and size of choice. Vector, Size depends on font used, Bold, Stroke of choice, for Fill I used same pattern. Type your text. Add Inner Bevel of choice. Add Drop Shadow of choice. Name this layer text.

STEP 6 Resize tag for group requirements.
Add your watermark And artist’s copyrights.

STEP 7 Save as .pspimage to retain layers for future changes. Save as .jpg using Jpeg Optimizer to send thru your group.

TO ANIMATE

STEP 1 Activate the tube layer. Using the Freehand Selection Tool, Point to Point go around parts of the hair you would like to “blow”.
Duplicate the layer 2 times for a total of 3 layers.

STEP 2 Activate bottom tube layer and go to Effects / Plugins / Eye Candy 4000 / Jiggle: Bubbles, 13.50, 2, 6, Seamless Tile unchecked, Random Seed 1. If you don’t have EC 4000 try EC 3.1. You may have to play with the settings.
Move up to copy of tube layer and repeat Eye Candy effect but click on Random Seed once. Do the same to copy (2) of tube layer, repeat Eye Candy effect but click on Random Seed once again.

STEP 3 Hide copy and copy (2) of tube layer. Copy Merged, go to Animation Shop and Paste as New Animation.

STEP 4 Hide original tube layer, unhide copy of tube layer. Copy Merged, go back to Animation Shop and Paste after Current Frame. Do the same with copy (2) of tube layer.
View Animation. For a strong wind you can leave Frame Speed at 10 or if you want a lighter wind change Frame Properties to a higher number. I used 30.

STEP 5 When happy Save As .gif file with these settings: Slider all the way at top for Better Quality. Under Colors tab: 255 colors, Optimized Octree, Error Diffusion. Under Optimizations tab: Check Write minimal frames and Map Identical Pixels other boxes should be unchecked.

All done! I hope you have enjoyed my tutorial. Remember this is just a guide. Experiment using different colors, gradients or patterns, images and settings. Any questions or if you would like to show me your results, you can reach me at kayewinters@zoomtown.com. This tutorial was written 8/26/10 by Kaye'z Designz.

Sunday, August 15, 2010

Video Montage


This tutorial is copyrighted to Kaye @ Kaye'z Designz. You may print out for personal use but do not post to any site or distribute as your own. Any resemblance to others online is purely coincidental.
Supplies Needed: Paint Shop Pro any version, I used X3. You can get it from COREL. 4 or 5 images of choice and a camcorder tube. I used some fall photos I took a few years ago. You may use your own color, gradient or pattern, I used a sunset and autumn image to create a 3rd image using Arithmetic. Font of choice. Notes: Open images in PSP. Open font and minimize to task bar. SAVE OFTEN.

STEP 1 Open new transparent canvas 500 X 500, Resolution 72.0. Flood Fill with color, gradient, pattern or scrap kit paper of choice.
I took 2 separate images and created a 3rd image with Image / Arithmetic using settings shown. Make sure larger image is in top box where it says Image #1. Copy.

Arithmetic Settings STEP 2 On working canvas Select All and Paste into Selection (Ctrl + Shift + L). Name this layer BG.

STEP 3 Copy and Paste camcorder as New Layer, Resize 60%. Drop Shadow of choice, mine was 3, 3, 65, 8, Black. If using my supplies move camcorder to lower left side to cover part of the dark area. Name this layer camcorder.

STEP 4 On same layer take your Magic Wand: Tolerance 10, Feather 0 and click inside camcorder window. Hit your Delete key.
While still selected add a New Layer and apply Cutout: 0, 0, 100, 25, Black. Keep selected.

STEP 5 Expand Selection by 5 or 10 pixels. Go below camcorder and add New Layers for each of your chosen images. Copy one of your images and Paste into Selection on first new layer. Continue with each different image until you have all your new layers filled. I named my layers frame1, frame2, etc. Deselect.

STEP 6 Add any other elements you would like to complete your tag.

STEP 7 With your Text Tool, using font and settings of choice type your text. I used Coolsville, size 60. Stroke 0.5 and for fill I made Seamless Tile with default settings out of my Arithmetic BG. I can’t share font since I’m not sure where it came from.

STEP 8 Resize tag if necessary for group requirements.
Add any copyright information, your watermark and / or your name.

STEP 8 Save as .pspimage to retain layers for future changes. If you wish to animate continue.

TO ANIMATE

STEP 1 Open Animation Shop click on Propagate Paste icon. Back in PSP close off all your camcorder images (from Step 5) except for bottom one.

STEP 2 Copy Merged, go to AS and Paste as New Animation.

STEP 3 In PSP close bottom camcorder image and open next one up. Copy Merged.

STEP 4 In AS Paste after Current Frame. Repeat until you have all your camcorder images in AS.

STEP 5 Select frame1 and then Select All (Ctrl + A). Change Frame Properties to 50 or 60.

STEP 6 View Animation and if happy Save As .gif file with these settings: Slider all the way at top for Better Quality. Under Colors tab: 255 colors, Optimized Octree, Error Diffusion. Under Optimizations tab: Check Write minimal frames and Map Identical Pixels other boxes should be unchecked.

If you would like to add a butterfly like I did and animate follow next steps.

STEP 1 Find a butterfly that is not rotated and doesn’t have a Drop Shadow. Copy and Paste in Animation Shop. Turn on Propagate Paste in AS if not already on.

STEP 2 Go to File / New and create a New Canvas slightly larger than your butterfly. Paste butterfly on new canvas.

STEP 3 Go to Effects / Insert Image Effect / Compress: Start with Animation Frame, Effect Length: 2.0 secs, Frames per Second: 2 fps which will give you 4 frames + 1. If you added more images than I did adjust the Frames per Second to match your number of frames.

STEP 4 Click on Customize and use Horizontal and Canvas Color. Click OK, OK. Delete Frame1.

STEP 5 Go to Animation / Rotate: Left, 45 Degrees, nothing else checked.

STEP 6 Use Crop Tool and Crop Around Opaque Area. I pulled the bounding box out about 1 square on all 4 sides to give a little more room. Double click to apply Crop.

STEP 7 Select All, Copy and Paste into Selected Frame (Ctrl + E) and place where you like on main canvas.

All done! I hope you have enjoyed my tutorial. Remember this is just a guide. Experiment using different colors, gradients or patterns, images and settings. Any questions or if you would like to show me your results, you can reach me at kayewinters@zoomtown.com. This tutorial was written 8/16/10 by Kaye'z Designz.

Sunday, June 27, 2010

Happy 4th

2010 06 28a Happy 4th 01b

This tutorial is copyrighted to Kaye @ Kaye'z Designz. You may print out for personal use but do not post to any site or distribute as your own. Any resemblance to others online is purely coincidental.
Supplies Needed: Paint Shop Pro any version, I used X3. You can get it from COREL. Tube of choice. I used one by Ed Mironiuk, which can be purchased at CILM. You may use your own color, gradient or pattern, I used Nanson’s gradient mqc Flag. Font of choice, I used Burlesque. Plugins Needed: Xenofex 2 / Constellation and AS’s Insert Image Effect / Rotate. Notes: Open round flag in PSP, add the gradient to your My PSP Files folder or where ever you store your gradients. Open font and minimize to task bar. SAVE OFTEN.

    STEP 1  Open new canvas 500 X 500, Resolution 72.0. Flood Fill with color, gradient or pattern of choice. I used black. Name this layer BG.

    STEP 2  Add a New Layer. Flood Fill with gradient of choice. I used Nanson’s mqc Flag.  Resize layer 95%. Apply Effects / Geometric Effects / Circle: check Transparent. Apply Effects / Distortion Effects / Wave: 40, 75, 65, 2, Wrap. Apply Effects / Geometric Effects / Circle: check Transparent. Give the circle a Drop Shadow: 1, -1, 100, 1, #0000FF. Add another Drop Shadow; -1, 1, 100, 1, #FF0000. Name layer circles.

    STEP 3  On same layer using the Deform Tool with Rulers on, Resize circle to 250 X 250. Move to upper left corner. Apply Simple Filter / Top Left Mirror.

STEP 4  Copy and Paste round USA flag as New Layer. Resize 90%.

    STEP 5  Copy and Paste tube of choice. Resize if necessary. Add Drop Shadow: 3, 3, 65, 8, Black. Name this layer tube.

    STEP 6  Grab your Text Tool with font and size of choice. I used Burlesque, Vector, Size 50, Bold, Stroke of choice, for Fill I used Nanson’s mqc Flag. Type your text. Add Inner Bevel of choice. Add Drop Shadow of choice. Name this layer text.

    STEP 7  Resize tag for group requirements. Add your watermark And artist’s copyrights making sure it is legible.

    STEP 8  Save as .pspimage to retain layers for future changes. Save as .jpg using Jpeg Optimizer to send thru group. If you wish to animate continue.

TO ANIMATE

    STEP 1  Open Animation Shop click on the Propagate Paste icon. From PSP Copy and Paste the round flag into AS as New Animation.

    STEP 2  Go to Effects / Insert Image Effects / Rotate with these settings: Start with Animation Frame, Length 1.5, Frames per Second 6 fps, total of 9 frames. Click on Customize: 360, Canvas Color. Delete frame 1, Select All, minimize for now.

    STEP 3  In PSP activate the circles layer, Duplicate 2 times for a total of 3 circles layers.
    Activate bottom circles layer and go to Effects / Plugins / Alien Skin Xenofex 2 / Constellation: 2, 50, 50, 0, 100, 75, 45, Keep Original Image, Random Seed - Whatever is there.
    Move up to next circles layer and apply same effect but hit the Random Seed once. Do the same for top circle layer.

    STEP 4  Close off all layers except the BG layer and bottom circles layer. Copy Merged and in AS Paste as New Animation.
    Back in PSP close bottom circles layer and open next circles layer. Copy Merged and in AS Paste after Current Frame. Do the same for the top circles layer.

    STEP 5  In AS Select All 3 frames and Copy. Click on frame 3 and Paste after Current Frame. Click on frame 6 and Paste after Current Frame. You should have 9 frames. Go back to frame 1 and Select All, Copy.

    STEP 6  Maximize the rotating flag that you minimized earlier. Make sure all frames are still selected. Copy / Paste into Current Frame (Ctrl + E).

    STEP 7  Back in PSP open all layers and then close off BG layer, 3 circles layers and the flag layer. Copy Merged and in AS Paste as New Animation. Copy then on animation with black bg, circles layers and rotating flag Paste into Selected Frames. View Animation. I changed Frame Properties to 25 as it was too fast for me.

    STEP 8  Save as .gif file with these settings: Slider all the way at top for Better Quality. Under Colors tab: 255 colors, Optimized Octree, Error Diffusion. Under Optimizations tab: Check Write minimal frames and Map Identical Pixels other boxes should be unchecked.

All done! I hope you have enjoyed my tutorial and that it made sense. Remember this is just a guide. Experiment using different colors, gradients or patterns, images and settings. Any questions you can reach me at kayewinters@zoomtown.com. This tutorial was written 6/28/10 by Kaye'z Designz.

Monday, May 31, 2010

Spring Fever

2010 05 31a Spring Fever 01b

This tutorial is copyrighted to Kaye @ Kaye'z Designz. You may print out for personal use but do not post to any site or distribute as your own. Any resemblance to others online is purely coincidental.
Supplies Needed: Paint Shop Pro any version, I used X3. You can get it from COREL. Tube of choice. I used one by Thom Brommerich, FTU General Permission. You may use your own color, gradient or pattern, I used Leaves BG. Font of choice or use mine NovakSpring. Notes: Open images in PSP. Open font and minimize to task bar. SAVE OFTEN.

STEP 1  Open new canvas 500 X 500, Resolution 72.0. Flood Fill with color, gradient or pattern of choice. I used #E0E0E0. Name this layer BG.

STEP 2  Add a New Layer. Flood Fill with pattern of choice. I used Leaves BG. Apply Bordermania / Round Button #3: 30, 0, 100, 0, 2, OK.
On button layer Select All. Float, Defloat. Selections / Modify / Contract by 30.
Apply FM Tile Tools / Blend Emboss.
Add New Layer and apply Cutout: 0, 0, 100, 30, Black. Deselect. Name layer button.

STEP 3  Copy and Paste tube of choice. Resize to fit inside button. Drop Shadow of choice, mine was 3, 3, 65, 8, Black. Name this layer tube.

STEP 4  Add any elements of choice.

STEP 5  Grab your Text Tool with font and size of choice. I used NovakSpring, Vector, Size 50, Bold, Stroke of choice, for fill I used same pattern used for button. Type your text. Add Inner Bevel of choice. Add Drop Shadow of choice. Name this layer text.

STEP 6 Resize tag for group requirements.
Add your watermark And artist’s copyrights.

STEP 7  Save as .pspimage to retain layers for future changes. Save as .jpg using Jpeg Optimizer to send thru group. If you wish to animate continue.

TO ANIMATE

STEP 1  Activate the Button layer. Duplicate 3 times for a total of 4 layers.
Select All. Float, Defloat. Selections / Modify / Contract by 30.

STEP 2  Activate copy of button layer and go to VM Natural / Sparkle: 20, 255, 255, 255, 255, 142. Move up to copy (2) of button layer and repeat Sparkle changing first # to 20 and last # to 152. Do the same to copy (3) of button layer, repeat Sparkle changing first # to 20 and last # to 162.

STEP 3  Hide copy (2) and copy (3) of button layer. Copy Merged, go to Animation Shop and Paste as New Animation.

STEP 4  Hide copy of button layer, unhide copy (2). Copy Merged, go back to Animation Shop and Paste after Current Frame. Do the same with copy (3) of button layer.

STEP 5  View Animation and if happy with the speed of Sparkles, Save as .gif file with these settings: Slider all the way at top for Better Quality. Under Colors tab: 255 colors, Optimized Octree, Error Diffusion. Under Optimizations tab: Check Write minimal frames and Map Identical Pixels other boxes should be unchecked.

All done! I hope you have enjoyed my tutorial. Remember this is just a guide. Experiment using different colors, gradients or patterns, images and settings. Any questions you can reach me at kayewinters@zoomtown.com. This tutorial was written 5/31/10 by Kaye'z Designz.

Friday, May 14, 2010

Pirates Ahoy

2010 05 14a Pirates Ahoy 01b

This tutorial is copyrighted to Kaye @ Kaye'z Designz. You may print out for personal use but do not post to any site or distribute as your own. Any resemblance to others online is purely coincidental.
Supplies Needed: Paint Shop Pro any version, I used X3. You can get it from COREL. Tube of choice. I used one by Elias Chatzoudis, it can be purchased at MPT. You may use your own color, gradient or pattern. Pattern I used is in supplies. Font of choice. Plugins Needed: AAA FotoFrame HERE and Virtual Painter 4 HERE. Notes: Open tube in PSP. Open font and minimize to task bar. SAVE OFTEN.

STEP 1 Open new canvas 500 X 500, Resolution 72.0. Flood Fill with color, gradient or pattern of choice. I used EC 3.1 Swirl Seamless Tile 02 in supplies.

STEP 2 Go to Effects / Plugins / Virtual Painter 4: Filter - Impasto, Material - Paper (Medium), Under Adjust change Color to Subtle. All the other settings I left at Normal. Or you can you another Plugin that creates various brush strokes. Name this layer BG.

STEP 3 Add a New Layer. Flood Fill with white. Go to AAA Frames / Frame Works and create a frame that goes with your background or tube. I used color Gray and Dark & Light 20. That way I can Colorize it to my liking.
Select the Magic Wand and click on the white area and hit Delete. While still selected add a Cutout of choice if desired. Deselect. Colorize your frame if you like. Name this layer frame.

STEP 4 Copy and Paste tube of choice. Resize if needed. Drop Shadow of choice, mine was 3, 3, 65, 8, Black. Move below frame layer and move to position shown in my tag. Name this layer tube.

STEP 5 Add any elements of choice that go with your tube or theme. Name each layer with what the element is.

STEP 6 Resize your tag if needed for your group’s requirements.

STEP 7 Add your name and / or text in font of choice.

STEP 8 Add copyright information making sure it is legible.

STEP 9 Save as .pspimage to retain layers for future changes. Save as .jpg using Jpeg Optimizer to send thru group.

STEP 10 For my animation on this tag I used a bling of a pirate ship.

STEP 11 Open your bling in Animation Shop. If it has a “background” frame delete it and then see how many frames you have. Click on the Propagate Paste icon so it is active.

STEP 12 Back in PSP make sure you’ve left a space for the bling. Copy Merged and take to AS and Paste as New Animation. Duplicate the frame so you have the same number that is in the bling. On mine the bling had 3 frames so I Duplicated the tag so I had 3 frames. Selections / Select All.

STEP 13 Resize the bling so it will fit in space you allowed on the tag.

STEP 14 On your bling do Selections / Select All. Edit / Copy. On the tag Paste into Selected Frame (Ctrl + E). Save As a .gif file.

All done! I hope you have enjoyed my tutorial. Remember this is just a guide. Experiment using different colors, gradients or patterns, images and settings. Any questions you can reach me at kayewinters@zoomtown.com. This tutorial was written 5/14/10 by Kaye'z Designz.

Sunday, April 25, 2010

Alien Band

2010 04 25a Alien Band 01b

This tutorial is copyrighted to Kaye @ Kaye'z Designz. You may print out for personal use but do not post to any site or distribute as your own. Any resemblance to others online is purely coincidental.
Supplies Needed: Paint Shop Pro any version, I used X3. You can get it from COREL. Tube of choice. I used one by Linda Biggs, it can be purchased at CILM. You may use your own color, gradient or pattern. Font of choice or use mine AlienMushroom. Mask of choice or use mine WSLmask003. Notes: Open tube and mask in PSP. Open font and minimize to task bar. SAVE OFTEN.

STEP 1  Open new canvas 500 X 500, Resolution 72.0. Flood Fill with color, gradient or pattern of choice. I used #E0E0E0. Name this layer BG.

STEP 2  Add a New Layer. Flood Fill with another color, gradient or pattern of choice. I used Charade Seamless Tile. Apply mask of choice. I used WSLmask003. Merge / Merge Group. Drop Shadow of choice. Name this layer mask/pattern.

STEP 3  Add New Layer & Flood Fill with Gradient: Rainbow Pastel, Sunburst, Repeats 10, Invert unchecked, Center Point 50, 50, Focal Point 50, 100. Apply same mask and Merge Group. Change Blend Mode to Saturation (L) or Overlay. Name this layer mask.

STEP 4  Copy and Paste tube of choice. Drop Shadow of choice, mine was 3, 3, 65, 8, Black. Name this layer tube.

STEP 5  Grab your Text Tool with font and size of choice. I used AlienMushroom, Vector, Size 60, Bold, Stroke 1 black, for fill I used same gradient from step 3. Type your text. Add Inner Bevel of choice. Add Drop Shadow of choice. Name this layer text.

STEP 6  Add any elements of choice.

STEP 7  Resize canvas if necessary for your group requirements. Add copyright and make sure it is readable.

STEP 8  Save as .pspimage to retain layers for future changes. If you don’t wish to animate Save As .jpg using Jpeg Optimizer to send thru your group.

TO ANIMATE

STEP 1  Activate the mask/pattern layer and Duplicate 2 times for a total of 3 layers.

STEP 2  Activate bottom mask/pattern layer and go to Alien Skin / Xenofex 2 / Constellation: 2, 50, 50, 0, 100, 75, 45, Keep Original Image, Random Seed 3893. Move up to copy of mask/pattern layer and repeat Constellation and hit Random Seed once. Do the same to copy (2) of mask/pattern layer, repeat Constellation and hit Random Seed once.

STEP 3  Hide copy and copy (2) of mask/pattern layer. Copy Merged, go to Animation Shop and Paste as New Animation.

STEP 4  Hide original mask/pattern layer, unhide copy of mask/pattern layer. Copy Merged, go back to Animation Shop and Paste after Current Frame. Do the same with copy (2) of mask/pattern layer.

STEP 5  View Animation and if happy with speed Save As .gif file with these settings: Slider all the way at top for Better Quality. Under Colors tab: 255 colors, Optimized Octree, Error Diffusion. Under Optimizations tab: Check Write minimal frames and Map Identical Pixels other boxes should be unchecked.

All done! I hope you have enjoyed my tutorial. Remember this is just a guide. Experiment using different colors, gradients or patterns, images and settings. Any questions you can reach me at kayewinters@zoomtown.com. This tutorial was written 4/25/10 by Kaye'z Designz.

Wednesday, April 14, 2010

Using Xero Fritillary

2010 04 14a - Using Xero Fritillary 01b

This tutorial is copyrighted to Kaye @ Kaye'z Designz. You may print out for personal use but do not post to any site or distribute as your own. Any resemblance to others online is purely coincidental.
Supplies Needed: Paint Shop Pro any version, I used X3. You can get it from COREL. Tube of choice. I used one by Victor Modafferi, it can be purchased at MPT. You may use your own color, gradient or pattern. Font of choice. Mask of choice or use mine WSL_mask003. Notes: Open tube and mask in PSP. Open font and minimize to task bar. SAVE OFTEN.

STEP 1  Open new canvas 500 X 500, Resolution 72.0. Flood Fill with color, gradient or pattern of choice. I used #E0E0E0. Name this layer BG.

STEP 2  Add a New Layer. Flood Fill with another color, gradient or pattern of choice. I used Metallic Silver gradient set at Linear, Angle 0, Repeats 1, Invert checked.

STEP 3  Apply mask of choice. I used WSL_mask003 with Invert Mask Data unchecked. Merge / Merge Group. Colorize if you wish. Name this layer mask.

STEP 4  Copy and Paste tube of choice. Resize 80% or as needed. Name this layer tube.

STEP 5  Add any other elements you like.

STEP 6  Add your name and / or watermark. Add any copyrights required. If you need to Resize tag for group limitations do it before adding copyright info. Name layers name / CR respectively.

STEP 7  Active mask layer. In layer palette click on the Layer Link Toggle (where it says None). You should now have a 1 where None was. Duplicate layer twice for a total of 3.

STEP 8  On bottom mask layer go to Effects / Xero / Fritillary: 10, 30, 10, 10. Move up to copy of mask layer and change Variation to 20. Move up to copy (2) of mask layer and change Variation to 30.

STEP 9  If you want to get creative and have Eye Candy 4000 Duplicate tube layer twice for total of 3 layers. On bottom tube layer go to Effects / EC 4000 / Corona use the Magnetic Flux preset but change Glow Width to 50. Move up to copy of tube layer and in EC click Random Seed once. Do the same on copy (2) of tube layer.

STEP 10  Save as .pspimage to retain layers for future changes. Save as .jpg using Jpeg Optimizer to send thru group if you don’t animate.

TO ANIMATE
STEP 1  Close off top 2 tube layers and top 2 mask layers.

STEP 2  Copy Merged and in Animation Shop Paste as New Animation.

STEP 3  In PSP close bottom tube and mask layers. Open copy of tube and mask layers. Copy Merged and in AS Paste after Current Frame.

STEP 4  In PSP close copy of tube and mask layers. Open copy (2) of tube and mask layers. Copy Merged and in AS Paste after Current Frame.

STEP 5  View Animation. When happy with speed Save As .gif file with these settings: Slider all the way at top for Better Quality. Under Colors tab: 255 colors, Optimized Octree, Error Diffusion. Under Optimizations tab: Check Write minimal frames and Map Identical Pixels other boxes should be unchecked.

All done! I hope you have enjoyed my tutorial. Remember this is just a guide. Experiment using different colors, gradients or patterns, images and settings. Any questions you can reach me at kayewinters@zoomtown.com. This tutorial was written 4/14/10 by Kaye'z Designz.

Friday, April 2, 2010

Easter 2010

2010 03 23a Easter 2010 01b

This tutorial is copyrighted to Kaye @ Kaye'z Designz. You may print out for personal use but do not post to any site or distribute as your own. Any resemblance to others online is purely coincidental.
Supplies Needed: Paint Shop Pro any version, I used X3. You can get it from COREL. Tube of choice. I used one by Dominic Marco, it can be purchased at CILM. You may use your own color, gradient or pattern. Font of choice or use mine Easter. Mask of choice or use mine WSLmask003. You will need to download WSL_Masks001-060 to get it. Scrap Kit of choice or use mine Easter by Angel Lottie. I think this came from Lottie’s Place which is now closed. Plugin Psychosis. Notes: Open tube and mask in PSP. Open font and minimize to task bar. SAVE OFTEN.

STEP 1 Open new canvas 500 X 500. Flood Fill with color, gradient or pattern of choice. I used #E0E0E0. Name this layer BG.

STEP 2 Add a New Layer. Flood Fill with another color, gradient or pattern of choice. I used paper4 from kit. Apply mask of choice. I used WSLmask003 with Invert Mask Data unchecked. Merge / Merge Group. Name this layer mask.

STEP 3 Copy and Paste frame of choice from kit, I used frame2. Drop Shadow of choice, mine was 3, 3, 65, 8, Black. Name this layer frame.

STEP 4 With Magic Wand select inside the frame. Add a New Layer below the frame. Paste a different paper into Selection, I used paper3. Deselect. Name layer frame fill.

STEP 5 Paste tube of choice below frame. If your tube has a close-up use it for this step. If not increase tube size so face fills the frame. With Magic Wand click inside frame. Expand selection by several pixels. Invert selection and activate tube layer. Hit Delete on keyboard. Set Blend Mode to Luminance (L) and Opacity to 50. Name this layer frame tube.

STEP 6 Click on top layer in layer palette. Paste tube again and Image / Mirror. Resize if needed. Add Drop Shadow of choice. Move into place. Name layer main tube.

STEP 7 Add any other elements of choice. I added bunny, basket and eggs. Add Drop Shadows to each layer and name each layer accordingly.

STEP 8 Grab your Text Tool with font and size of choice. I used Easter, Vector, Size 50, Bold, Stroke null, for fill I used #B03CEA. Type your text / name. Add Inner Bevel of choice. Add Drop Shadow of choice. Name this layer text.

STEP 9 Resize your canvas for group requirements if necessary. Add any copyrights required. Add watermark. Save as .pspimage to retain layers for future changes. If you don’t animate Save as .jpg using Jpeg Optimizer to send through your group.

IF YOU CHOOSE TO ANIMATE FOLLOW BELOW STEPS

STEP 1 Activate the mask layer and Duplicate 2 times for a total of 3 layers.

STEP 2 Activate bottom mask layer and go to Plugins / Psychosis / Streaker: 10, 10. Move up to copy of mask layer and repeat Plugins / Psychosis / Streaker: 15, 15. Do the same to copy (2) of mask layer, repeat Plugins / Psychosis / Streaker: 20, 20.

STEP 3 Hide copy and copy (2) of mask layer. Copy Merged, go to Animation Shop and Paste as New Animation.

STEP 4 Hide original mask layer, unhide copy of mask layer. Copy Merged, go back to Animation Shop and Paste after Current Frame. Do the same with copy (2) of mask layer.

STEP 5 View Animation. I thought speed was a little fast so I changed Frame Properties to 15.

STEP 6 Save as .gif file with these settings: Slider all the way at top for Better Quality. Under Colors tab: 255 colors, Optimized Octree, Error Diffusion. Under Optimizations tab: Check Write minimal frames and Map Identical Pixels other boxes should be unchecked.

All done! I hope you have enjoyed my tutorial. Remember this is just a guide. Experiment using different colors, gradients or patterns, images and settings. Any questions you can reach me at kayewinters@zoomtown.com. This tutorial was written 03/23/10 by Kaye'z Designz.

Wednesday, March 3, 2010

He Is Risen

2010 03 01a - He Is Risen 01b

This tutorial is copyrighted to Kaye @ Kaye'z Designz. You may print out for personal use but do not post to any site or distribute as your own. Any resemblance to others online is purely coincidental.
Supplies Needed: Paint Shop Pro any version, I used X3. You can get it from COREL. Tube of choice. I used one by Elias Chatzoudis, it can be purchased at MPT. You may use your own color, gradient or pattern. Background of choice or use mine. Fonts of choice or use mine Fairydust and Easter Sunrise at daFont. Notes: Open background image and tube in PSP. Open fonts and minimize to task bar. SAVE OFTEN.

STEP 1 Open new canvas 500 X 500. Copy your background image and on new canvas Selections / Select All and Paste into Selection. I used 3 Crosses. Deselect. Name this layer BG.
Optional: If your image is dull in color go to Layers / New Adjustment Layer / Hue, Saturation, Lightness and play around with various settings. I put 40 in the Saturation box to brighten the image a little.

STEP 2 Copy and Paste tube of choice. If using my background image move tube to lower left side of canvas. Drop Shadow of choice, mine was 3, 3, 65, 8, Black. Name this layer tube.

STEP 3 Grab your Text Tool with font and size of choice. I used Fairydust, Vector, Size 50, Bold, Stroke 1.5 white, fill null. Type your text He Is Risen. Name this layer text1.

STEP 4 Apply Alien Skin Eye Candy 5 Nature / Corona: Streaky, 20, 4.25, 53, 34, 30, 100, 0, Radiate from Selection & Mask Selection checked, Random Seed 1727.

STEP 5 Make a foreground / background gradient using #FEFB03 / #F86A0C: Linear, Angle 0, Repeats 1, Invert checked. Using font of choice or Easter Sunrise, Size 40, fill null. Type your name. Add Drop Shadow: 1, -1, 100, 1, Black.

STEP 6 Add any copyrights required. If on a dark background add a New Layer below the copyright layer. Fill with a light color from tag.
Activate copyright layer and selections, select all. Float, Defloat. Expand selection by 2.
Invert selection and highlight to fill layer and hit Delete. Select None.

STEP 7 Save as .pspimage to retain layers for future changes. If you don’t wish to animate Save as .jpg using Jpeg Optimizer to send thru group.

IF YOU CHOOSE TO ANIMATE FOLLOW BELOW STEPS

STEP 1 Activate the Background layer and Duplicate 1 times for a total of 2 layers.

STEP 2 Activate bottom background layer and go to Alien Skin / Xenofex 2 / Lightning choose preset Straight from Above and make these changes: On Glow Tab change Glow Opacity to 40. Zoom Out on image so you can see the start and end circles. Move top circle to the right and above the tag. Drag bottom circle to the left a little.
On copy of background use same settings but reverse positions of start and end circles.

STEP 3 Hide copy and copy of background layer. Copy Merged, go to Animation Shop and Paste as New Animation.

STEP 4 Hide original background layer, unhide copy of background layer. Copy Merged, go back to Animation Shop and Paste after Current Frame.

STEP 5 View Animation. It will be moving pretty fast so to slow it down Select All frames, right click and go to Frame Properties and put in a higher number. I used 60.

STEP 6 View Animation again and if happy with speed, Save As .gif file with these settings: Slider all the way at top for Better Quality. Under Colors tab: 255 colors, Optimized Octree, Error Diffusion. Under Optimizations tab: Check Write minimal frames and Map Identical Pixels other boxes should be unchecked.

All done! I hope you have enjoyed my tutorial. Remember this is just a guide. Experiment using different colors, gradients or patterns, images and settings. Any questions you can reach me at kayewinters@zoomtown.com. This tutorial was written 3/1/10 by Kaye'z Designz.

Monday, March 1, 2010

Adjustment Layers

Header Image2

This tutorial is copyrighted to Kaye @ Kaye'z Designz. You may print out for personal use but do not post to any site or distribute as your own. Any resemblance to others online is purely coincidental.
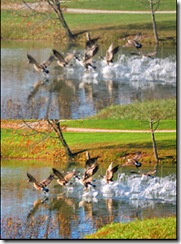
Supplies Needed: Paint Shop Pro any version, I used X3. You can get it from COREL. Several images with multiple colors in them but kinda on the dull side. I have included 3 images for use if you want them. If you use the Tree or Geese images please add my copyright to finished tag. Notes: Open image(s) in PSP.
Adjustment Layers are used to alter an image without affecting the original image.
You can get the same effects by going to Adjust / Brightness & Contrast or Hue & Saturation on Menu bar and choosing one of the effects listed. But the effect will be placed directly on your image.

STEP 1  Open an image of choice or one of mine. Duplicate and close the original for future use.

STEP 2  In the Layer Palette click on down arrow on icon that looks like two pieces of paper.
Select New Adjustment Layer and choose Hue / Saturation / Lightness.
If you don’t have that icon you can go to Layers / New Adjustment Layer on the Menu bar and select same effect.

STEP 3  When box opens up put checkmark in box that says Preview on Image so you can see effect immediately on your image. You can also click on arrow next to Preview to get rid of the windows at top of box.

STEP 4  Play around with different numbers in the Hue, Saturation & Lightness boxes. On the Geese image I put -10 in Hue box and 50 in the Saturation box. You will see in Layer Palette a new layer called Hue / Saturation / Lightness 1 above the original image which is unchanged.
NOTE: You can add other Adjustment Layers in any order above your original image. Play around with the different types of Adjustment Layers and settings to see what you can come up with.

STEP 5  When satisfied with your settings save as a .pspimage so you can go back and make changes later.

STEP 6  Add your name and / or watermark. Add any copyrights if required.

STEP 7  If sending through your group Save as .jpg using Jpeg Optimizer but be sure to keep your .pspimage also.

All done! I hope you have enjoyed my tutorial. Remember this is just a guide. Experiment using different colors, gradients or patterns, images and settings. Any questions you can reach me at kayewinters@zoomtown.com. This tutorial was written 3/1/2010 by Kaye'z Designz.

Friday, February 5, 2010

Happy April Fool’s Day

2010 02 04a - Happy April Fool's Day 01b

This tutorial is copyrighted to Kaye @ Kaye'z Designz. You may print out for personal use but do not post to any site or distribute as your own. Any resemblance to others online is purely coincidental.
Supplies Needed: Paint Shop Pro any version, I used X2. You can get it from COREL. Tube of choice. I used Suzanne Richards “Kiss Me I’m Funny, it can be purchased at CILM. You may use your own color, gradient or pattern. Font of choice or use mine Kingthings Slipperylip this is a FTU font. You can view others at Kingthings site. Mask of choice or use mine Vix_Mask073. FTU kit by Scraps Dimensions “Mardi Gras”. Notes: Open tube in PSP. Open font and minimize to task bar I’ve included the Font and mask in Supplies for people on dial-up but please check out the sites if you can. SAVE OFTEN.

Step 1 Open new canvas 550 X 550. Flood Fill with color, gradient or pattern of choice. I used black. Name this layer BG.

Step 2 Add a New Layer. Selections / Select All. Open SD MG Preview.jpg from kit and Copy & Paste into Selection. Deselect. Apply Gaussian Blur of 10.

Step 3 Apply mask of choice. I used Vix_Mask073 with Invert Mask Data unchecked. Merge / Merge Group. I Duplicated mask layer and then Merged Down to make it darker. I added Drop Shadow of 1, -1, 100, 1, #FF00FF. Name this layer mask.

Step 4 Copy and Paste tube of choice. Resize if needed. Drop Shadow of choice, mine was 3, 3, 65, 8, Black. Move toward lower left of tag. Name this layer tube.

Step 5 Add Fireworks 1 from kit just above background layer (BG). Resize 60% and place in upper left of tag.

Step 6 Grab your Text Tool with font and size of choice. I used Kingthings Slipperylip, Vector, Size 55, Bold, Stroke 2 #FF00FF, for fill I used #00FA03. Type “Happy April Fool’s Day or saying of choice. Position in top right area of tag. Drop Shadow 1, -1, 100, 1, Black. Name this layer text.

Step 7 Resize your tag to size required by your group or size of choice. Add copyrights and your watermark on separate layers. Name layers accordingly.
NOTE: If you use a black or dark background you may need to create a “backscreen” under your copyright layer so it remains readable. See my tutorial Creating Backscreen for CRs or WMs HERE. I included tile I used for the backscreen in supplies.

Step 8 Add your name. I used same settings as Step 5 but changed size to 65. Rotate Left 25 Degrees. Place in lower right side of tag.

Step 9 Layer Palette should look like this from top to bottom: Copyright (CR), your name, text, tube, mask, fireworks, background (BG).

Step 10 Save as .pspimage to retain layers for future changes. Save as .jpg using Jpeg Optimizer to send thru group.

IF YOU CHOOSE TO ANIMATE FOLLOW BELOW STEPS

Step 1 Activate the fireworks layer and Duplicate 2 times for total of 3 layers.

Step 2 Activate bottom fireworks layer and go to Alien Skin / Xenofex 2 / Constellation: 2, 20, 19, 0, 100, 75, 45, Keep Original Image, Random Seed 1. Move up to copy of fireworks layer and repeat Constellation same settings but hit Random Seed once. Do the same to copy (2) of fireworks layer, repeat Constellation same settings but hit Random Seed once again.

Step 3 Hide copy and copy (2) of fireworks layer. Copy Merged, go to Animation Shop and Paste as New Animation.

Step 4 Hide original fireworks layer, unhide copy of fireworks layer. Copy Merged, go back to Animation Shop and Paste after Current Frame. Do the same with copy (2) of fireworks layer.

Step 5 View Animation and if happy Save as .gif file with these settings: Slider all the way at top for Better Quality. Under Colors tab: 255 colors, Optimized Octree, Error Diffusion. Under Optimizations tab: Check Write minimal frames and Map Identical Pixels other boxes should be unchecked.

All done! I hope you have enjoyed my tutorial. Remember this is just a guide. Experiment using different colors, gradients or patterns, images and settings. Any questions you can reach me at kayewinters@zoomtown.com. This tutorial was written 2/4/2010 by Kaye'z Designz.

Thursday, January 28, 2010

Lucky St Patrick

2010 01 28a - Lucky St Patrick 01b (Kaye)

This tutorial is copyrighted to Kaye @ Kaye'z Designz. You may print out for personal use but do not post to any site or distribute as your own. Any resemblance to others online is purely coincidental.
Supplies Needed: Paint Shop Pro any version, I used X2. You can get it from COREL. Tube of choice. I used one by Suzanne Richards, it can be purchased at CILM. Do not use without a license. You may use your own color, gradient or pattern. Paper from scrap kit of choice. I used Paper9 from Voodoo’s St Patty Scrap. I enclosed a pattern for use if you don’t have any papers. Font of choice, I used PattyDay. Template #25 by Kristin at Toxic Desirez. You will need to download Templates 20-29 but then you can delete the ones not wanted. Filters needed: Eye Candy 3.1 / Glow and DSB Flux / Bright Noise (if you animate). Notes: Open tube and paper in PSP. Open font and minimize to task bar. SAVE OFTEN.

Step 1 Open Template 25 by Kristin. Go to Image / Resize and change Resolution to 72.000. Be sure to change Pixel Dimension size back to original size i.e. 600 pixels or change Percentage back to 100. Save. Duplicate then close original. This step is necessary if using a PTU tube per artists’ TOUs. Go to Image / Canvas Size and add 50 pixels to all sides.

Step 2 In Layer Palette Delete the top layer (copyright). Also Delete the Large Clover layer. Go to bottom layer, if it’s blank rename BG (Background) and Flood Fill with white. If bottom layer is the clover 1 layer add a New Layer and move to bottom of layer palette. Flood Fill with white and name BG.

Step 3 With BG layer still active Copy and Paste paper of choice as New Layer. Go to Selection Tool - Circle and draw a circle approximately 325 by 325 pixels. Making sure paper layer is selected go to Selections / Invert and hit Delete on keyboard. Center layer on image. Rename paper.

Step 4 Select clover 1 layer. Selections / Select All, Selections / Float, Defloat. Selections / Modify / Expand by 1. Flood Fill with #15632C or color of choice. Deselect. Apply Inner Bevel of choice. I used Bevel #2, 9, 0, 2, 0, 0, White, 315, 50, 30. Apply Drop Shadow of choice. I used 2, -2, 100, 2, Black. Repeat Drop Shadow changing V & H to -2, 2.

Step 5 Select clover 2 layer and repeat Step 4 but change color to #54CA60 or color of choice. Deselect and Repeat Inner Bevel and both Drop Shadows.

Step 6 Still on clover 2 layer Copy and Paste tube as New Layer. Give tube a Drop Shadow of choice. I used 3, 3, 65, 8, Black. With Eraser Tool erase bottom of tube where it overlaps clover 1 and clover 2 layers. Rename tube.

Step 7 Highlight word art layer. In layer palette change top box color to #15632C or color of choice. Using the Change to Target Brush, size 100 run your cursor over all the text. Release mouse button and then do again. I also used Adjust / Brightness / Contrast at -40, 40 to darken text more. Apply Inner Bevel: Bevel #2, 9, 0, 2, 0, 0, White, 315, 50, 30. Go to Effects / Plugins / Eye Candy 3.1 / Glow: 2, 100, Fat, Black, Draw Everywhere unchecked (no button look).

Step 8 Resize tag to size allowed for your group. Add any copyrights required.

Step 9 Add your name with font and size of choice.

Step 10 Save as .pspimage to retain layers for future changes. Save as .jpg using Jpeg Optimizer to send thru group.

IF YOU CHOOSE TO ANIMATE FOLLOW BELOW STEPS

ANIMATION

Step 1 Activate the paper / circle layer and Duplicate 2 times for a total of 3 layers.

Step 2 Activate bottom paper / circle layer and go to Effects / Plugins / DSB Flux / Bright Noise: Intensity 50, Mix checked. Move up to copy of paper / circle layer and repeat DSB Flux changing Intensity to 55. Do the same to copy (2) of paper / circle layer, repeat DSB Flux changing Intensity to 60.

Step 3 Hide copy and copy (2) of paper / circle layer. Copy Merged, go to Animation Shop and Paste as New Animation.

Step 4 Hide original paper / circle layer, Unhide copy of paper / circle layer. Copy Merged, go back to Animation Shop and Paste after Current Frame. Do the same with copy (2) of paper / circle layer.

Step 5 Save as .gif file with these settings: Slider all the way at top for Better Quality. Under Colors tab: 255 colors, Optimized Octree, Error Diffusion. Under Optimizations tab: Check Write minimal frames and Map Identical Pixels other boxes should be unchecked.

All done! I hope you have enjoyed my tutorial. Remember this is just a guide. Experiment using different colors, gradients or patterns, images and settings. Any questions you can reach me at kayewinters@zoomtown.com. This tutorial was written 1/28/10 by Kaye'z Designz.

Sunday, January 3, 2010

Revolutionary

2010 01 03a - BamBam - Revolutionary 01b (H-J)

This tutorial is copyrighted to Kaye @ Kaye'z Designz. You may print out for personal use but do not post to any site or distribute as your own. Any resemblance to others online is purely coincidental.
Supplies Needed: Paint Shop Pro any version, I used X2. You can get it from COREL. Animation Shop (Optional). Tube of choice. I used one by Bam-Bam, it can be purchased at MPT. You may use your own color, gradient, pattern or scrap kit. I used FTU scrap kit by Monti called Big Bang Boom Blog Train. After entering site on the left click on scrap kits. Kit is near the top. Font of choice. Mask of choice or use mine WSL mask 257. Notes: Open supplies & tube in PSP. Open font and minimize to task bar. SAVE OFTEN.

Step 1 Open new canvas 500 X 500. Flood Fill with white.. Name layer BG.

Step 2 Add a New Layer. Flood Fill with another color, gradient, pattern or paper of choice. I used Monti-BigBangBoom-Paper-Stars. Apply WSL mask 257 with Invert Mask Data unchecked. Merge / Merge Group. Drop Shadow of choice, I used 1, -1, 100, 1, #0000FF. Name layer Mask Blue.

Step 3 Duplicate mask layer and Colorize using 255, 150. Same Drop Shadow but use #FF0000 for color. Name layer Mask Red.

Step 4 Add frame of choice. I used Monti-BigBangBoom-StarsAndStripes-Frame. Add Drop Shadow of choice. I used 3, 3, 65, 8, Black. Name layer Frame.

Step 5 Add any other elements of choice. I used red and blue candles and Patriotic word art. Name layers what they are.

Step 6 Copy and Paste tube of choice. Drop Shadow of choice, mine was 3, 3, 65, 8, Black. Place above frame. Activate frame layer and with Magic Wand click inside frame to get marching ants. Re-activate the tube layer and Selections / Invert. Use Eraser Tool to erase bottom part of tube sticking over frame. Name this layer tube.

Step 7 Add any copyrights required. Add your name and / or text and watermark. All on separate layers.

Step 8 Save as .pspimage to retain layers for future changes. Save as .jpg using Jpeg Optimizer to send thru group.

IF YOU CHOOSE TO ANIMATE FOLLOW STEPS BELOW

Step 1 Hide the red mask layer. Copy Merged, take to Animation Shop and Paste as New Animation.

Step 2 Back in PSP hide blue mask layer and unhide red mask layer. Copy Merged, take to Animation Shop and Paste after Current Frame.

Step 3 Select both frames (Ctrl + A). Change Frame Properties to 30, or your choice.

Step 4 Save as .gif file with these settings: Slider all the way at top for Better Quality. Under Colors tab: 255 colors, Optimized Octree, Error Diffusion. Under Optimizations tab: Check Write Minimal Frames and Map Identical Pixels other boxes should be unchecked.

All done! I hope you have enjoyed my tutorial. Remember this is just a guide. Experiment using different colors, gradients or patterns, images and settings. Any questions you can reach me at kayewinters@zoomtown.com. This tutorial was written 1/3/2010 by Kaye'z Designz.